|
|
|
|
| HOME SEW CRAFTS DECOR SHOP |
|
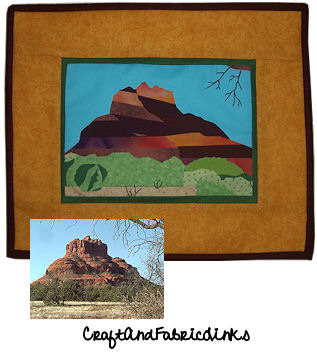
SEDONA LANDSCAPE APPLIQUE
|
| lessons holiday patterns sewing patterns |

|
|
Turn A Travel Photo Into An Applique PatternPreserve memories in a wall hanging or quilt!Also see: Applique Patterns |
|
Page 1: supplies |
Turn A Travel Photo Into An Appliqued Wall HangingDesigner: Christina Sherrod
In this tutorial, I will show you how I turned my photo in to a pattern, and I will show you how to create "layers" of rock - typical of the Desert Southwest. |
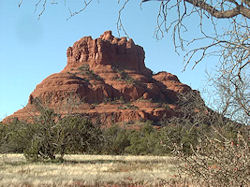 A very good friend and I took a trip to Sedona together several years ago. We both lived in Arizona at the time. It was a wonderful trip. She later moved to Kansas, and I missed her. I wanted to capture the memories of our trip, so I created a Sedona Landscape wall hanging. Actually, I created two - one for each of us. I visited her in Kansas recently and saw the wall hanging in her living room. She sees it every day. I still love to look at mine as well - it brings back fun memories.
Applique Pressing Sheet, Stabilizer, & Iron-on Adhesive
Applique Pressing Sheet & Iron On Adhesive (fusible web) I will take you through the steps with this project. If you would like more instruction, go to: Floral Applique Pressing Sheet Tutorial. To learn how to turn a coloring book page into an applique pattern, go to: Lizard Applique.
Free Motion Embroidery This project also uses Machine Embroidery Stabilizer. This material provides a stabilizing backing for creating even stitches when performing free motion machine embroidery. Visit my Amazon store page to purchase stabilizer, fusible web, fusible fleece, insul-bright, heat resistant cloth, quilting pins, and other items I use in my projects. |
Wall Hanging SizeMy finished Sedona Landscape is 10.5" high x 12.5" in length. |
Supplies
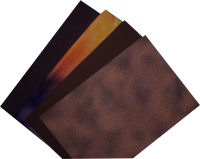
Fabric |
|
Recommended: PRE-WASH ALL FABRIC. Do NOT use fabric softener. Washing will remove any sizing, which will allow for a stronger bond. NOTE: I did NOT pre-wash my fabric. My wall hanging will not be washed often and I found the bond was strong. Other Items * Fusible web is a heat activated adhesive. It can be purchased by the yard (like fabric). I used about 10" from my roll of fusible web for this project. Pattern
Overall Layout Download and print the overall layout to use as a guide. Download and print both pages of pattern pieces. Cut out the pattern pieces. Optional: Sewing Supplies
thread
|
How I Turned My Photograph Into A Pattern
|
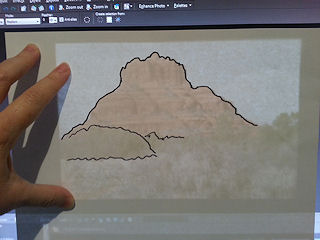 If you look at my pattern, you will see that it is made up of lines only. To create my pattern, I opened my photograph on my computer (jpg file). I placed a piece of white paper over my monitor and traced all major lines of the photograph. The photo of my computer monitor tracing is of a different Sedona photo than the one I ended up using. I'm posting it to show the technique.
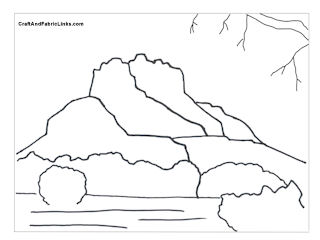 Another method would be to print the photo (from your computer onto paper). Use a marker to draw lines over all major lines of the photo. Then place a piece of white paper over the photo and trace over the previously drawn lines. You now have a pattern, created from a photo.
Continue to page 2 for directions |
Related Project
Decorate your patio or interior with colorful "no-care cactus". The cactus and ladybug are actually painted rocks! |
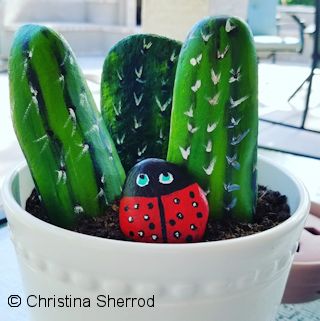 Painted Rocks Cactus Garden
Quick Reference |
Learn To Paint!free video tutorialsVisit my youtube channel. Free videos with step by step instructions. Paint beautiful paintings for your home. |

Please ShareI rely on advertising to keep my site free. Please share with friends. |
Privacy Policy & Terms Of UseBy using our website, you expressly consent to our Privacy Policy and Terms & Conditions. All Patterns, images and instructions are copyright protected. |