|
|
|
|
| HOME SEW CRAFTS DECOR SHOP |
|
HALLOWEEN CAT APPLIQUE
|
| lessons holiday patterns sewing patterns |

|
|
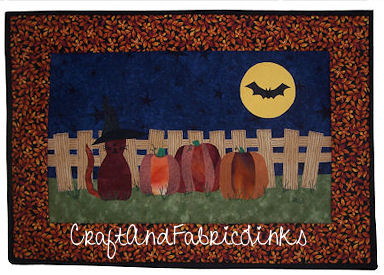
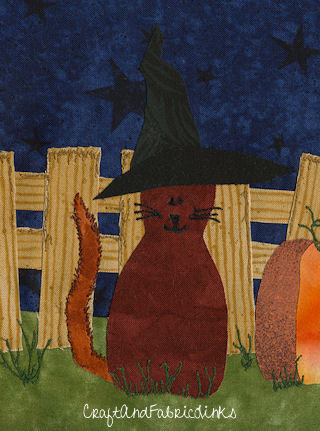
cat, moon, bat, pumpkins & weathered fenceDesigner: Christina Sherrod Pumpkins, a crooked, weathered fence, a cat in a hat, and a bat flying by the moon create a perfect Halloween night scene. Free motion embroidery adds the finishing touch. |
|
Wall Hanging Series:Detailed Halloween SceneThis pattern is part of a seasonal and holiday series of wall hangings. They all use the same size of hanging sleeve, so they can easily be changed with the seasons. For more patterns in this series, go to Holiday Series Wall Hangings For more Halloween patterns, go to Halloween Projects |
Applique Pressing Sheet & Free Motion EmbroideryUse an applique pressing sheet, fusible web, and free motion machine embroidery to create this adorable fall scene. This is not as difficult as it looks. An applique pressing sheet assists in creating intricate appliques. Free motion embroidery is easy once you've had a little practice. My pattern was designed to be used with an applique pressing sheet. If you need instruction on free motion embroidery or the use of a pressing sheet refer to the following tutorials.
Refer to:
Related: no sew applique sewing applique more Halloween/Fall projects |
Wall Hanging SizeThe finished wall hanging is approximately 19" wide x 13" high. Wall Hanging Series
|
Supplies
Fabric One 3" x 15.5" piece backing fabric for hanging sleeve Binding (I used 1.5" width strips of backing fabric to create my binding: you will need about 70" of binding) Grass / ground fabric: one piece measuring 3" x 15.5" Sky fabric: one piece measuring 7" x 15.5" Fence fabric: 15" long x approx. 6" Scraps of fabric pumpkins, cat, cat's hat, bat and moon. Other Fusible fleece or batting: 19.5" x 13.5" (I use fusible fleece) Applique Pressing Sheet Fusible Web (or heat activated adhesive) Stabilizer (for machine embroidery) Note, if you pre-wash fabric, do NOT use fabric softener. Washing will remove any sizing, which will allow for a stronger bond. I do not pre-wash and my pieces stick well. Any loose edges can be glued using applique glue. Pattern Sewing Supplies
thread
|
DirectionsAll seams are 1/4"1. Cut Fabric PiecesCut fabric pieces large enough to place all pattern pieces of your cat, cat hat, moon, bat, pumpkins, etc. Cut pieces of fusible web (heat activated adhesive) large enough to fit your fabric pieces (but not larger than your pieces of fabric). |
2. Add Fusible Web To Fabric Pieces
Follow the manufacturer's instructions for your fusible web. These are the instructions for Heat N Bond LITE (at the time I used it): Using a dry iron set on the "silk" setting, iron the rough side to the WRONG side of the fabric for approximately 2 seconds. You will be ironing on the paper side. You should have a piece of fusible web on the wrong side of each piece of fabric. |
3. Trace Patterns / Cut FabricCut out each paper pattern piece. Turn them WRONG SIDE UP. Place the pattern pieces on the paper side of the web (back side of fabric). Trace around the pattern piece, tracing the pattern onto the paper side of the web. Cut out the fabric piece. Refer to the fusible web tutorial listed at the top of this page if you need further instructions. |
4. Lay Out / Bond Pieces
1. cat tail Note that the pieces that will be on the bottom are placed first; pieces are then placed in order so that top layer pieces are placed last. When happy with the placement, (for Heat N Bond) use a dry iron set to "silk" setting and iron down the pieces, pressing with the iron approximately 6-8 seconds. NOTE: Do this on an ironing board or other surface that can take some heat. The pressing sheet will protect surfaces, but I found that my cutting mat started to warp a bit when it was under my pressing sheet as I ironed (my iron was turned up higher than necessary at this point). The nice thing about Heat N Bond LITE is that it works with a LOW iron setting. If you are using another fusible web, follow the instructions for your product. Repeat the above procedure to create the pumpkins and the moon/bat. If your moon is a light fabric and your sky is a dark fabric, I recommend that you use two layers of moon fabric. Use the fusible web to fuse the two layers together. |
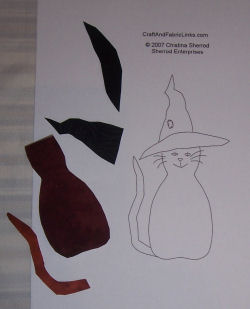 Lay down the "finished cat" drawing. Lay the applique pressing sheet over the pattern. You will be able to see the drawing under the pressing sheet. Peel off the paper backing on the fabric pieces for the cat and cat's hat. Using the pattern as a guide, lay out your pieces in the following order:
5. Peel Off Completed Appliques
In this photo, all three appliques are finished. NOTE: I later removed the cat's face and embroidered it instead. |
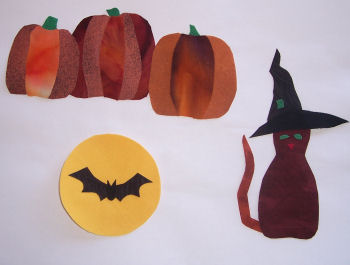 Once you are happy with each finished applique, you can peel it off the pressing sheet. Carefully remove the applique, starting at one end and peeling it off slowly.
Continue to page 2 |
Related Project
"Hello Fall" palette wood pumpkin painting video and pattern. Pattern & Video (scroll down page) |
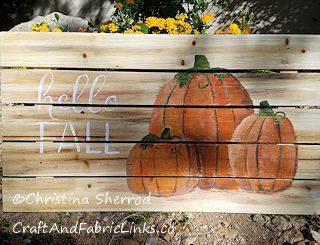 PUMPKINS ON WOOD PALETTE BOARD
Quick Reference |
Learn To Paint!free video tutorialsVisit my youtube channel. Free videos with step by step instructions. Paint beautiful paintings for your home. |

Please ShareI rely on advertising to keep my site free. Please share with friends. |
Privacy Policy & Terms Of UseBy using our website, you expressly consent to our Privacy Policy and Terms & Conditions. All Patterns, images and instructions are copyright protected. |