|
|
|
|
| HOME SEW CRAFTS DECOR SHOP |
|
PLEATED APRON PATTERN
Optional Embroidery |
| lessons holiday patterns sewing patterns |

|
-> home decor -> Kitchen
|
Page 1: Prepare Main Piece
|
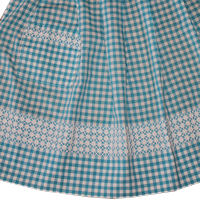
Beautiful Pleated Apron With Pocket & Optional Embroidery Adjust dimensions if needed. I love the pocket, but it can be left off. |
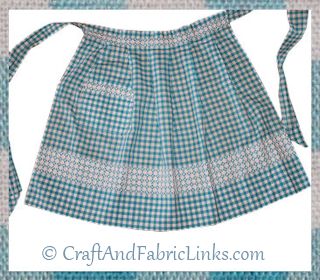 This pattern comes from my grandmother. The blue checked apron shown was handed down from her to me. I cherish it. My daughter loves to cook, and black and white are her favorite colors, so I made the floral apron for her, without the embroidery.
Apron Size - easy to adjust
|
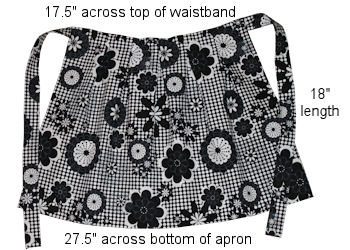 These instructions create an apron with the dimensions listed on the photo. This apron is suitable for a waist (over clothes) of about 34", and the length from waist to hem is 18". Adjust your size as needed. For example, if you need 3" added to the waist, cut your fabric 31.5" wide, rather than 28.5" wide. If you want a longer apron (this was made for a person 5 feet 2" tall) add to the length as needed. For example, if you want your apron to be 5" longer, cut your piece 31.5" long, rather than 26.5" long.
Cutting ToolsI recommend using a Rotary Cutter, Cutting Mat and Sewing Ruler. I use these tools for most projects. They allow for easy, precise cutting. Visit my Amazon store page to purchase these tools, fusible fleece, insul-bright, heat resistant cloth, quilting pins, and other items I use in my projects. |
Supplies For One ApronFabric 1.25 yard apron fabric (you actually need 1 yard - this allows for shrinkage). Embroidery Floss: Purchase enough embroidery floss for your desired stitches. General Sewing Supplies
thread to match background of fabric
|
Cut Fabric Pieces
Cut one 26.5" high x 28.5" wide piece for the main apron. Cut one 6" wide" x 7.75" piece for the pocket (optional) Cut 2 ties, each measuring 3.5" x 22" |
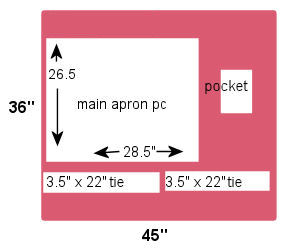 NOTE: The diagram is not to scale, but the pieces do fit as shown.
1. Fold Side Edges / Stitch Top & Bottom Edges
Fold the bottom edge under 1/4"; press. Fold under bottom edge another 1/4"; press. Stitch across bottom edge. The bottom edge now has a finished 1/4" hem. Fold the top edge under 1/4"; press. Fold under top edge another 1/4"; press. Stitch across top edge. The top edge now has a finished 1/4" hem. |
 Fold under one side edge of the main apron piece 1/4". Press. Do not stitch. Repeat with the opposite side edge.
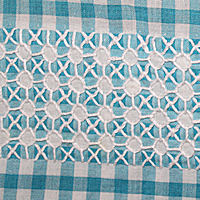
2. Create Lower Embroidery Area & Hem Fold LineTurn the apron (main piece) right side up. using a large sewing ruler and washable fabric marker, draw a line across the apron piece, 5.5" from bottom edge. This will be the fold line. Continue to step 3 if you are not adding embroidery. Mark another line 3" up from first line. This marks the base of the embroidery. Draw another line up 2.5" from the embroidery base line. The area between the two last lines is where embroidery can be stitched. The photo is a close up of my grandmother's embroidery. The hem will be folded under at the 5.5" line and the hem will completely cover the backside of the embroidery. Embroider the bottom area of the apron at this time. If you are not adding embroidery, or if you are finished embroidering, proceed to "Stitch Hem". The following photos show the embroidery (photo taken after the hem was stitched in step 3). |
|
|

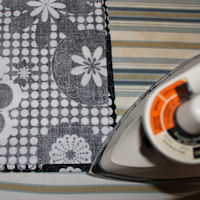
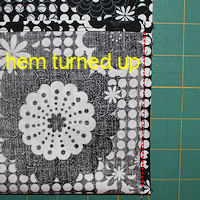
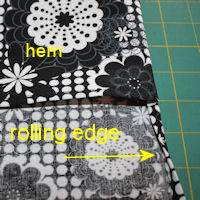
3. Stitch HemLay piece right side up. Fold the bottom edge UP along the hem fold line (5.5" from bottom edge). The hem will be right side together with the front of the apron. Stitch along both sides, using a 1/4" hem. Stitch line is shown in red. Turn the hem area right side out (far right photo). Straighten corners. Press. The side edges will naturally roll under one more time, toward the wrong side of the apron. |
|
|
Page 1 of 4 continue to page 2 |
Related Project
Beautiful flower magnet. Add spring to your home. |
 DIY Refrigerator Magnet
Quick Reference |
Learn To Paint!free video tutorialsVisit my youtube channel. Free videos with step by step instructions. Paint beautiful paintings for your home. |

Please ShareI rely on advertising to keep my site free. Please share with friends. |
Privacy Policy & Terms Of UseBy using our website, you expressly consent to our Privacy Policy and Terms & Conditions. All Patterns, images and instructions are copyright protected. |