|
|
|
|
| HOME SEW CRAFTS DECOR SHOP |
|
PLEATED APRON page 3
Optional Embroidery |
| lessons holiday patterns sewing patterns |

|
-> home decor -> Kitchen
|
Page 3: Create Pleats
|
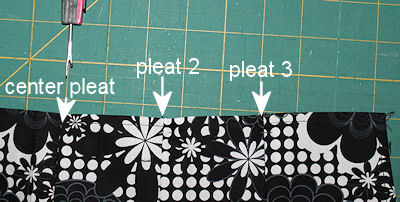
8. PleatsThe apron will have a total of 5 pleats. We already made the center pleat. We will need to make 4 more pleats - 2 on each side of center. The pleats need to be evenly spaced. This is not difficult once you understand the formula. Each pleat is made by stitching 1" from the fold; since there are two sides to the fold, each pleat will remove 2" from the total width of the waisband. Since there are 5 pleats, the pleats will remove a total of 10" from the width of the top of the apron. |
|
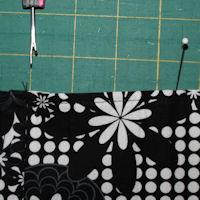
Compute Pleat Spacing There will be two pleats on the right half of the apron, dividing that part of the apron into 3 sections. Divide "W" by 3. Write down that number. We will call it "P" for pleat width. For my apron, P = 2.9. To make things easier, I rounded down to 2.75 inches. P = 2.75 inches. What that means is my pleats will be be spaced 2.75" apart with the distance from the far right pleat and the right edge being slightly bigger than 3 inches. Here it is again: measure from your center pleat to the right edge. That number is W. W divided by 3 equals P. Write down P. You can do the same thing I did and round up or down to an easy measure to work with; the end spacing will just be slightly different. Now you need to compute your fold lines. Since the pleats have 1" seams, you will need to add 1" to P. Fold Line = P + 1" My width (W) is 8.75. P = 2.75. I will create my fold line 3.75" to the right of my center pleat. In the photo on the left below, the seam ripper points to the center pleat seam, and the pin marks where the seam for the next pleat will be (2.75" from the center seam). In the photo on the right below, I place my fold line pin 3.75" to the right of the center pleat seam. Fold right sides together where the fold pin is. Stitch a 1" seam. Turn the piece wrong side up. Flatten the pleat and press. |
|
|

|
Repeat this process again for the far right pleat. Then repeat the entire process on the left side of the center pleat. |
|
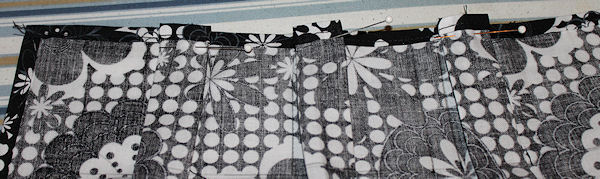
Press all pleats on the back side as shown in the following photo. |
|
Page 3 of 4
|
Related Project
Quick & Easy! Protect your table with these easy-to-make trivets. |
 Table Trivets
Quick Reference |
Learn To Paint!free video tutorialsVisit my youtube channel. Free videos with step by step instructions. Paint beautiful paintings for your home. |

Please ShareI rely on advertising to keep my site free. Please share with friends. |
Privacy Policy & Terms Of UseBy using our website, you expressly consent to our Privacy Policy and Terms & Conditions. All Patterns, images and instructions are copyright protected. |