|
|
|
|
| HOME SEW CRAFTS DECOR SHOP |
|
THANKSGIVING TURKEY APPLIQUE
Sewing Pattern |
| lessons holiday patterns sewing patterns |

|
Get Ready For Thanksgiving!
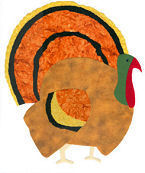
Beautiful, layered appliqueDesigner: Christina Sherrod Also see: |
|
Page 1: Supplies |
Part Of Our Wall Hanging Series
|
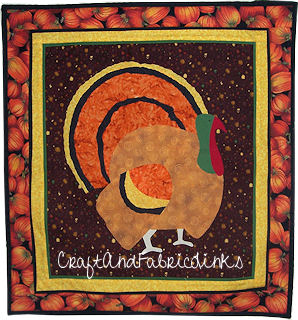
 Part of our seasonal wall hanging series. Measures approx. 20.5" wide x 23.5" tall.
About This PatternSIZE: The finished wallhanging measures approx. 20.5" wide x 23.5" tall, if the pattern is used in its orginal size.
This pattern is part of a seasonal and Holiday Series Wall Hangings. For more patterns in this series, go to Holiday Series Wall Hangings. For instructions on using an applique pressing sheet, go to: Applique Floral Pattern |
 Use this applique pattern for wall hanging, quilt, pillows, cards etc. Use with an applique pressing sheet for quick and easy assembly. Shrink pattern to fit to card stock. Print out the overall lay-out page. Shrink or enlarge as you need depending on your project.
SuppliesPattern & Layout Guide
My patterns download as pdf files. For instructions on downloading pdf files, Thanksgiving Turkey Layout Guide This is a small print that shows the overall layout of all turkey parts. Refer to this diagram when taping the pattern pieces together to create the layout page (page 2). If you wish to create a different sized turkey, print my pattern and then use a copier to shrink or enlarge the pattern. Print 2 copies of each of the following pages. One set will be taped together to create the layout page, and one will be cut apart to create the pattern pieces.
Turkey Pattern Page 1 Fabric, Batting (or fusible fleece) & Fusible Web Choose fabric and batting according to your project. NOTE: fusible fleece is fabulous for small projects such as this. Just fuse to your finished piece and then layer the top and bottom as you would any wall hanging or quilt.
Yellow Border: Two strips measuring 18.5" x 1.5", two strips measuring 17.5" x 1.5"
Hanging sleeve fabric: one piece measuring 3" x 15.5" Sewing Supplies
thread
|
|
Instructions for borders follow instructions for turkey applique (page 2). |
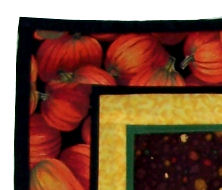 I added a 1" yellow border, then a 1.5" outer pumpkin border. A small strip of green is placed on top of the background with the fold toward the turkey, a small strip of black is placed with the fold toward the turkey on top of the yellow print. The outer binding is black.
DirectionsAll seams are 1/4" |
Continue to page 2 for directions |
Related Project
Free pattern for patriotic wood turkey for home or yard decor. Painting instructions included. |
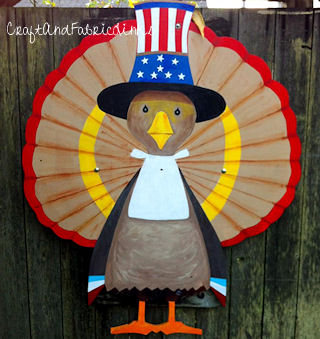 WOOD TURKEY PATTERN
Quick Reference |
Learn To Paint!free video tutorialsVisit my youtube channel. Free videos with step by step instructions. Paint beautiful paintings for your home. |

Please ShareI rely on advertising to keep my site free. Please share with friends. |
Privacy Policy & Terms Of UseBy using our website, you expressly consent to our Privacy Policy and Terms & Conditions. All Patterns, images and instructions are copyright protected. |