Wood Turkey
decor crafts -> wood -> yard
Wood Turkey Yard Decor
Design by : Walter Hoke
This delightful patriotic turkey was created by my father, Walter Hoke. He was an exceptional artist, and loved creating beautiful holiday decorations. He was also a waltercolor artist, and created many paintings during his lifetime. I miss him, but his creations live on. He gave me designs and information over the years, so that I could share his items with the world, through this website. His "Patriotic Thanksgiving Turkey" delighted many. You may use this pattern for your personal use only. Any other purpose must be first approved in writing by us. Our pattern is copyright protected and cannot be copied, displayed or distributed. - Christina

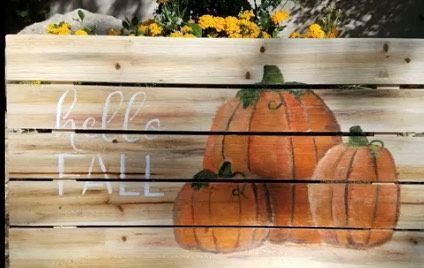
Also, see our wood pumpkin! Includes video tutorial for using the pattern to create a small painting for inddors.
Disclosure: This site contains affiliate links. As an Amazon Associate, I earn from qualifying purchases. Clicking on links, and purchasing products, may result in the seller paying us compensation - at no extra cost to you. Affiliate links are in green.
OUTDOOR USE / PATTERN SIZE
Use exterior paints if you plan to place the turkey outdoors.
Print the pattern (listed under supplies), then draw grid lines onto the pattern, as shown in the photo. Your grid lines can represent 6 inches, 1 foot, or any dimension you wish. Draw in the outlines of the turkey. Using your gridlines as a guide, redraw the pattern onto a sheet of plywood.
Applique or Painting

This pattern would also work well for applique sewing, or as a small painting for inside decor.
See Pumpkin Painting for instructions on making a small acrylic painting. Video tutorial included.
SUPPLIES
3/8" Plywood (sheet size depends on the size you plan to make your pumpkin - 1/4" plywood would be ok if you are making a smaller pumpkin, such as 2 feet x 2 feet or smaller)
Exterior Paints: Undercoat paint (primer), colors of your choice for pumpkin and hat. Shading colors will add dimension, but can be omitted. Follow the photo above as a guide or choose your own colors. Most home improvement stores offer small sample jars of paint.
Sand Paper: Medium to fine grit
Tack cloth
Paint Brushes - your choice, depending on size of your pumpkin
Turkey Pattern (color version) - download our free pattern (a jpg file) Our pattern prints to one 8.5” x 11” sheet of paper.
Turkey Outline Pattern (outline version)
INSTRUCTIONS
1. Prepare The Pattern
Print the pattern. I provide a color version, and a black/white outline version. Decide what size you wish your finished turkey to be. Draw grid lines onto the pattern. Draw the outlines of the turkey parts onto the pattern, as shown in the photo. Trace your lines from each square section onto a piece of paper. Copy and enlarge to the size you need.
NOTE: Each square on the pattern represents a unit of measure. For example, if each square respresents 1 foot, this pattern would create a turkey that is approximately 4 feet across. To use the pattern in such a way, simply draw grid lines onto your wood 1 foot apart. Then freehand draw in the turkey following the image.
The grid line squares can be any unit of measure. If you decide that each line will be drawn 6" apart, the turkey will be approximately 24" across.
2. Transfer Turkey Outline To Plywood
You can do this by placing graphite paper under your pattern pieces and using a stylus to press down on the lines of the pattern, transferring the pattern to the wood. Or, you can "free hand" draw the pattern onto the wood, using the pattern as a guide. Refer to the photo that is posted at the end of the article.
3. Cut Out The Turkey From The Plywood
Use a saber saw to cut your turkey from the sheet of plywood. CAUTION: You must be skilled with the saw before attempting to use it. If you are not skilled at the use of a saw, and knowledgeable about its safety, find a skilled craftsman to cut this for you. Always take all usual safety precautions when cutting wood (dust mask, eye safety goggles, etc.).
4. Prepare The Turkey For Painting
Sand the front of the turkey until smooth. Use a tack cloth to remove dust.
Apply a coat of primer to both sides of the wood (use exterior paint if the turkey will be used outdoors). Let dry.
5. Paint The Turkey
Paint the front of the piece with desired colors and details. If you need help with the design, tape or staple string lines to the turkey to create temporary grid lines. Use a pencil to lightly draw the pattern lines onto the turkey. A grid makes copying a pattern much easier, because you now know precisely where lines should be.
Paint the back of the piece with 2 coats of any exterior paint or varethane.
Mount your patriotic turkey on a fence, post, or stake. He can also lean up against a tree or the house.

Turkey Grid
Refer to step 2 above.
Turkey Painting
You can also use the outline pattern to trace onto a canvas. Create a super cute turkey painting for Thanksgiving decor. I will post a photo of mine once it is finished. I used the same techniques as I did on my small pumpkin painting.
More Art Projects


More Wood Projects


Gorgeous custom painted floral design on wood boxes for use in bridal or baby shower, anniversary, birthday, or other special occasion. Video and pattern included.