|
|
|
|
| HOME SEW CRAFTS DECOR SHOP |
|
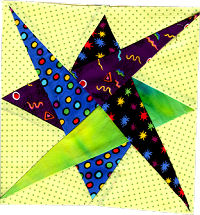
STAR FIRE Page 4
Star Center & Finish Blocks |
| lessons holiday patterns sewing patterns |
Third Color Set: Two BlocksFabric Print 1 & Fabric Print 4The third set of 4 blocks are created using prints 1 and 4. You choose how to cut these blocks. |
Your choice: double cut, triple cut, or double-triple
|
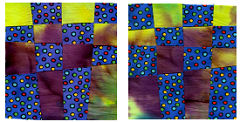 Select one square of print 1 and one square of print 4. Use your choice of double cut, double-triple cut, or triple-triple cut to create two blocks. I chose triple cut (both vertical and horizontal cuts were triple cut).
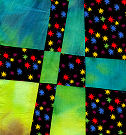
Fourth Color Set: Four BlocksFabric Print 2 & Fabric Print 3
|
 The fourth set of blocks are created using prints 2 and 3. You choose how to cut these blocks. I chose to double cut four blocks.
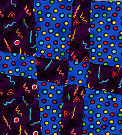
Fifth Color Set: Four BlocksFabric Print 2 & Fabric Print 4
|
 The fifth set of blocks are created using prints 2 and 4. You choose how to cut these blocks. I chose to double cut four blocks. I chose to triple cut the vertical cuts, and double cut the horizontal cuts (double-triple).
Sixth Color Set: Four BlocksFabric Print 1 & Fabric Print 3
|
 The sixth set of blocks are created using prints 1 and 3. You choose how to cut these blocks. I chose to double cut four blocks. I chose to triple cut the vertical cuts, and double cut the horizontal cuts (double-triple).
Center Quilt Block
|
 For your center block, make one 8.5" square quilt block. See the beginning of the instructions
for a sample block. I made the Laced Star block as my center block (go to
For your center block, make one 8.5" square quilt block. See the beginning of the instructions
for a sample block. I made the Laced Star block as my center block (go to
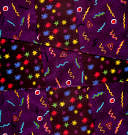
Plain Blocks - four blocksI cut two plain 8.5" blocks from print 2 and two plain 8.5" blocks from print 4. |
Assemble Your Quilt
I wanted a "starry night" look. Dark space and bright stars. I created the look of space by keeping my solid blocks mostly to one side of the quilt. When satisfied, stitch your quilt top together. Layer with backing and batting. Add binding and hanger on the back and you now have a beautiful new piece of art for your wall! For information on assembling your quilt, go to: Free Quilt Lessons. |
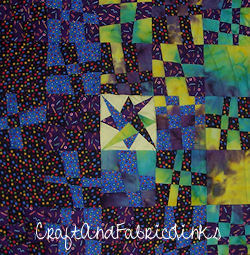 Lay out your blocks. Arrange them in whatever pattern you prefer. Re-arrange them and look at them again. Walk away and come back later. Do you still like the arrangement? Play around with your arrangement and have fun with it. Turn blocks in a different direction (upside down). How does that look?
Quick Reference |
Learn To Paint!free video tutorialsVisit my youtube channel. Free videos with step by step instructions. Paint beautiful paintings for your home. |

Please ShareI rely on advertising to keep my site free. Please share with friends. |
Privacy Policy & Terms Of UseBy using our website, you expressly consent to our Privacy Policy and Terms & Conditions. All Patterns, images and instructions are copyright protected. |