|
|
|
|
| HOME SEW CRAFTS DECOR SHOP |
|
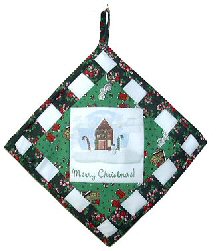
CHRISTMAS HOUSE
free graphics & pot holder pattern |
| lessons holiday patterns sewing patterns |

|
|
Page 1: supplies |
|
There is nothing more wonderful than a hand made, unique gift. This potholder is easy to make. Learn how to transfer an image to fabric. Use my free graphic, or one of your own favorite photos or graphics. Add lace, ribbon, and other trim as desired. Use this same technique to make a pot holder for each holiday!
Also see:
|
 Designer: Christina Sherrod
Pot Holder SizeFINISHED SIZE: approx. 8.75" x 8.75" |
Supplies
PROJECT SUPPLIES
Free Graphic: (or graphic / fabric of your choice for center diamond).
For instructions on downloading pdf files, go to: pdf instructions. Christmas Potholder Center Diamond Graphic pdf file - OR use your own graphic design or photo |
|
White Transfer Fabric: Two 8.5" x 11" sheets (treated fabric to print onto)
Red Fabric: a strip that is 24" long by 2v wide Backing Fabric, Batting & Insulation: 8.75" x 8.75" square Seam Binding: enough to go around the finished potholder (approximately 36") PLUS enough for the hanging loop (total 41"). Or, you can purchase a plastic or wood ring for hanging the pot holder. You can also make your own binding out of matching fabric. Go to: Continuous Bias Binding Instructions. Other: ribbons, lace, buttons and other trim SEWING SUPPLIES
thread
|
 Fabric
Continue to page 2 for directions |
Quick Reference |
Learn To Paint!free video tutorialsVisit my youtube channel. Free videos with step by step instructions. Paint beautiful paintings for your home. |

Please ShareI rely on advertising to keep my site free. Please share with friends. |
Privacy Policy & Terms Of UseBy using our website, you expressly consent to our Privacy Policy and Terms & Conditions. All Patterns, images and instructions are copyright protected. |