|
|
|
|
| HOME SEW CRAFTS DECOR SHOP |
|
CHEMO CAP PATTERN
reversible |
| lessons holiday patterns sewing patterns |

|
-> sewing patterns -> medical
Chemo Cap Pattern - donated by Judy Danz
The pattern was generously donated by Judy Danz, and printed here with permission. It is reversible, and fast and easy to make. Adjust the tie length to your own taste. Tutorial & Photos: Christina Sherrod |
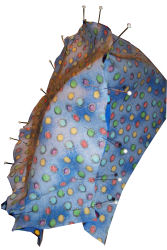
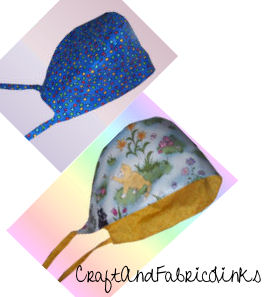 This pattern is so versatile. The caps shown in the photo were made for a child; she chose bright colors and kitten fabric. Use soft cotton or cotton flannel for comfort. For formal wear, make a non-reversible hat with an outer shell of velvet. A soft jersey would also work. Decorate per your taste with bling and other embellishment.
Chemo Cap SizePatterns include Adult and Child |
Choose From Two Sets Of Instructions
New: Don't miss my new article on 10 Simple Stress Busters (click image below) |
 NOTE: We include Judy's original pattern and instructions, plus our own instructions. Our instructions differ in the way the ties are constucted and sewn onto the hat. Our ties are constructed separately, then inserted into the open ends. Read through both sets of instructions and then choose the method of your choice. We also include photographs of the various steps we used. The following photo (red cap) is by Judy Danz.
Chemo Cap SizePatterns include Adult and Child |
Supplies
2/3 yard fabric (1/3 yard each of two prints) Fabric Marker Favorite turning tool (if using Judy's method of construction: not needed for our method) |

|
Other
Pattern
|
DirectionsNOTE: All seams 1/4" We provide two sets of instructions. Follow the original instructions of Judy Danz (printed on the pdf file), OR follow our instructions. They differ in the method of attaching the ties. 1. Make Ties
|
2. Construct Main Part of Hat
Lay one B right side up. Lay one A (of same fabric) over B, wrong side up, aligning centers. Pin at center. In the photo, the center pin is enhanced in red. |
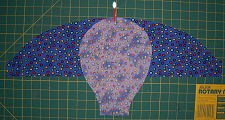 Cut one A and one B from fabric #1. Cut one A and one B from fabric #2. Transfer pattern dots to wrong side of fabric.
|
|
 Working along one side, continue to pin A to B, stopping at #1 dot. The photo shows the first side pinned.
|
Pin the other side, stopping at #2 dot. Stitch between dots.
Repeat these instructions for the second set of A and B. |
|
|
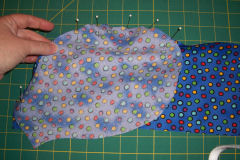
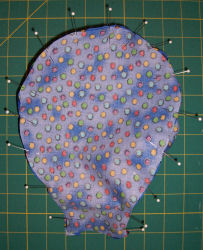
 Place one hat inside the other, right sides together. Pin. Stitch from dot #1 to dot #2. The photo shows the layers pinned together.
|
|
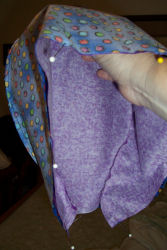
 Turn hat right side out. Iron under bottom open edge 1/4". Slide a tie into each end about 1/2v; pin. Topstitch around outer edge of hat, stitching around entire hat.
|
Tie in back, behind head. Tie in a bow, or leave ties dangling long. |
 ties sewn into place
Related Project
My hospital quilt was designed to bring comfort and cheer. It is a wonderful pattern for beginners. 6" blocks work up quickly. This is the perfect size for a hospital bed or wheelchair lap quilt. |
 Hospital Quilt
Quick Reference |
Please ShareI rely on advertising to keep my site free. Please share with friends. |
Privacy Policy & Terms Of UseBy using our website, you expressly consent to our Privacy Policy and Terms & Conditions. All Patterns, images and instructions are copyright protected. |