|
|
|
|
| HOME SEW CRAFTS DECOR SHOP |
|
MAIL & PAPER FILE page 3
sewing pattern |
| lessons holiday patterns sewing patterns |
-> sewing patterns -> home decor
-> sewing patterns -> home decor
|
page 3 of 3 |
InstructionsContinued From Page 2use 1/4" seam allowanceIron between each step. Read through all directions completely before beginning. |
|
4. Pocket Sections
Place one 14.5" x 11.5" piece of background right side up. Lay lower pocket right side up on top of background piece, aligning side and bottom edges. Baste sides and bottom edges together, close to edge. Middle Pockets: Repeat process for bottom pocket to create the two middle pockets ("Kevin" and "Christina" pockets in our organizer). Use one 14.5" x 11.5" piece of background fabric for each middle pocket section. |
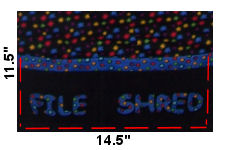 Bottom Pocket:
|
For the top pocket, repeat the same process as for the lower three pockets, except use the 14.5" x 14.5" piece of background fabric. Stitch Pocket Sections Together You now have four front pocket sections completed. Stitch the sections together, using a 1/4" seam allowance. Press all seam allowances DOWN (toward the bottom edge of the front piece). The inside of your pockets are finished (no seam allowances inside pockets). All raw edges are on the back side of the piece and will be covered by the backing fabric. ASSEMBLE, BIND AND ADD HANGING SLEEVE and STABILIZER SLEEVES
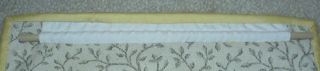
Fold sleeve lengthwise and press with iron. Place the sleeve right sides together on the right side of your backing piece so that it is centered along upper edge of the backing piece. NOTE: There is an important reason that the backing and batting was cut slightly larger than needed. You can trim away the excess once all three layers are basted. If the batting and backing are too small, however, there is nothing you can do. Start by aligning the upper edges; the excess on the sides and lower edges of the batting and backing will be trimmed away. The edge with the sleeve will be the TOP of the backing piece. Pin in place along edge. Stitch along fold line. Remove pins. See photo above right (stitch line is enhanced in red). Fold lower edge up and press; pin along edge of piece. Baste raw edges of sleeve to raw edge of backing. Stitch from edge of piece down 1/2", stitching close to edge of sleeve. Stitch the length of the sleeve, parallel to fold line, 1" from fold line. Stitch back up to top edge of piece, stitching close to edge of sleeve.
The photo below shows the stitching enhanced in red.
Add Stabilizer Sleeves
Pin backing to front piece, wrong sides together. Mark three horizontal lines on backing, to represent where the stabilizers will be. The stabilizer sleeves will be stitched to the backing. The bottom stabilizer sleeve should be a few inches from the bottom; the other two should be evenly spaced. Be sure they do not align with seams on the front piece, because these seams will be stitched over to hold the three layers together. These stabilizer sleeves will add strength to the front piece, preventing the piece from folding outward when mail is piled into the pockets.
Layer, Quilt
Turn piece right side up. Stitch in the ditch along pocket seams (seams along bottom edge of upper three pockets).
To help hold my three layers together, I added a few quilted stars to each pocket section. BE CAREFUL! If you add quilting, make sure you are not quilting through the hanging sleeve or stabilizer sleeves!
Bind & Hang
Add binding to your mail organizer. For more information on adding binding, go to: Assemble & Bind Quilt Run a wood dowel through the hanging sleeve. The dowel should be 2" longer than the sleeve. The sleeve measures 11"; cut the dowel 13". Screw two 5/8" brass cup hooks into your wall at a distance that is 1" greater than the length of your sleeve. If the sleeve is 11", the dowel is 13" and the hooks are 12" apart. Place the wood dowel with wall hanging onto the hooks. The photo below shows a finished sleeve with the dowel in the sleeve. Cut dowels to fit inside the three stabilizer sleeves. The dowels should fit inside the folds on each end of these sleeves. The sleeves are 13.5", so cut the dowels approximately 13.25" - 13.5" long.
|
 Create hanging sleeve


|
page 3 of 3 |
Quick Reference |
Learn To Paint!free video tutorialsVisit my youtube channel. Free videos with step by step instructions. Paint beautiful paintings for your home. |

Please ShareI rely on advertising to keep my site free. Please share with friends. |
Privacy Policy & Terms Of UseBy using our website, you expressly consent to our Privacy Policy and Terms & Conditions. All Patterns, images and instructions are copyright protected. |