|
|
|
|
| HOME SEW CRAFTS DECOR SHOP |
|
TROPICAL FISH WALL HANGING
Water Block Three |
| lessons holiday patterns sewing patterns |
-> sewing patterns -> animals & pets
|
Pattern & InstructionsWATER BLOCK 3 of 10Return to INDEX OF BLOCKS / GENERAL INSTRUCTIONS Also see: Quilt Lessons |
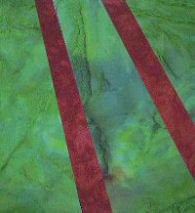
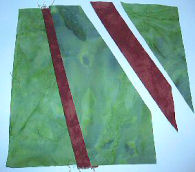
Water Block ThreeWater Block Three is made up of 5 pieces. This block is the last block of row two. The block consists of water, with the tip of a reed coming up from the lower edge and one reed passing through the block in the upper right corner. NOTE: I made one wall hanaging with the upper right corner reed in the dark rust color, and another wall hanging with the upper right corner reed in light green. Either way works well. Measures 6.5" wide x 8.5" tall When all blocks are completed, go to Overall Layout so you will know where to place each block. |
| NOTE ABOUT PRINTING: Be sure your printer is set to print at 100%. If "Shrink to fit" or "Fit to page" etc. is selected, YOUR PATTERN PIECES WILL NOT PRINT TO THE CORRECT SIZE. Every pattern page lists one or more dimensions. CHECK YOUR PRINTED PATTERN FOR ACCURACY OF SIZE. |
|
PATTERN PIECES Our patterns download as pdf files. For instructions on downloading pdf files, go to: pdf instructions. Water Block 3 Pattern: Page 1 (shows lay-out of block) |
Instructionsuse 1/4 " seam allowances; press between stepsIMPORTANT: Remember to square down all blocks and segments of blocks.
|
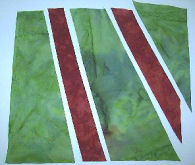 1. Lay out fabric pieces.
|
|
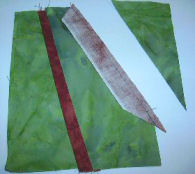
 2. Stitch Piece A to Piece B.
|
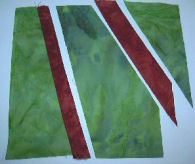
3. Stitch Piece B to Piece C. Line up the pieces as shown in the the lower left photo. The lower right photo shows Piece C sewn into place.
|
|
|
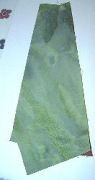
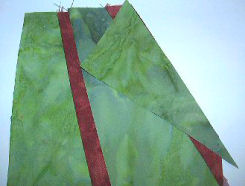
 4. Stitch Piece C to Piece D.
|
When finished, use your quilter's square to square up the block. It should measure 6.5" wide by 8.5" tall. |
 5. Stitch Piece D to Piece E.
Quick Reference |
Learn To Paint!free video tutorialsVisit my youtube channel. Free videos with step by step instructions. Paint beautiful paintings for your home. |

Please ShareI rely on advertising to keep my site free. Please share with friends. |
Privacy Policy & Terms Of UseBy using our website, you expressly consent to our Privacy Policy and Terms & Conditions. All Patterns, images and instructions are copyright protected. |