|
|
|
|
| HOME SEW CRAFTS DECOR SHOP |
|
WASTE BASKET COVER
|
| lessons holiday patterns sewing patterns |

|
-> sewing patterns -> home decor
|
Page 2 |
Directions3. Make Lining - for inside top of basket
Turn under the lower edge of the lining, 1/4" (on the smallest circumference side). Press. Top stitch. |
 Stitch all four lining pieces together, right sides together. Stitch the first piece to the last piece, right sides together. Alternate your colors if using four different fabric pieces. Press.
|
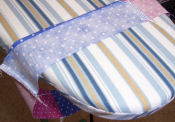
Turn lining to inside. Press along upper edge. |
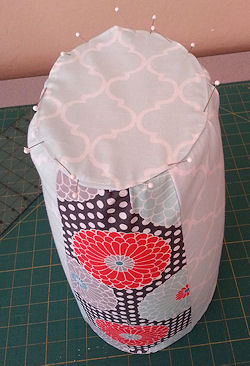
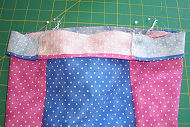 Pin the lining to the cover, right sides together. The unfinished edge of the lining should be the edge that is pinned. Align colors, or alternate them - it's your choice. Stitch around upper edge using a 1/4" seam.
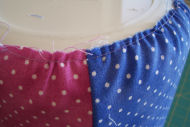
4. Adjust Fitting
Stitch a gathering stitch around the lower edge of the main cover, close to the edge (two lines are better, but be sure they are no more than 1/4" from edge). Turn basket upside down and place cover over basket. Turn right side up and place lining inside basket. Be sure the top of the cover is even with the top of the basket (it might help to tape lining into place inside the basket). Turn basket upside down. Pull the gathering stitches to adjust the fit of the bottom edge of the cover. It should come over the bottom of your basket about 1/4". |
5. Add The Cover Bottom
|
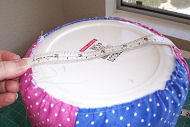 Round Bottom: Measure the diameter of the bottom of your waste basket. Add 1/2".
 |
This will be your pattern piece for the bottom. Oval, Rectangular or Square Bottom: Trace the bottom of the waste basket. Add 1/4" seam allowance all the way around your traced lines. This is now your pattern for the bottom. Using your pattern piece for the bottom, cut two pieces of fabric. Stitch them together, right sides together, using a 1/4" seam and leaving a few inches unstitched for turning. Turn right side out. Press. Top stitch around entire outer edge, 1/8" from the edge. This will close the opening that had been left for turning. |
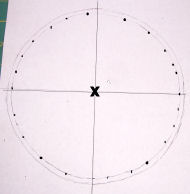 Using a compass, draw a circle the diameter you measured in the step above (plus the 1/2"). If you do not have a compass, draw a horizontal line cross the center of the paper. Draw a verticle line down the middle of the paper. Draw an "x" where the lines intersect. Take a ruler and lay it so that it runs next to the "x". Draw dots equal distances from the "x". The distance apart should be equal to the diameter and the "x" should be in the center of the dots (the dots are equal distance from the "x"). Do this several times, pivoting the ruler through the "x" a small distance each time. Connect the dots and you have a circle!
 |
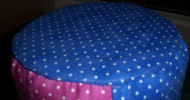
Method 1: Run a line of fabric glue over gathering stitches. Place the fabric bottom back over the cover edges, being sure to cover all gathered edges. Apply pressure and let dry. This was teh method I used for the purple / pink cover. Method 2: Pin into place; then hand stitch the bottom in place, using small "invisible" stitches. This was the method I used for the cover with the floral print. |
 Place fabric bottom on bottom of basket to check for fit. The edges of the bottom piece should cover the gathering stitches. Remove the bottom piece.
 |
|
 NOTE: If your lining doesn't lie down nicely, you can use double sided tape to help hold it in place. If you don't plan to remove the cover (for washing), you can glue the lining in place..
Quick Reference |
Learn To Paint!free video tutorialsVisit my youtube channel. Free videos with step by step instructions. Paint beautiful paintings for your home. |

Please ShareI rely on advertising to keep my site free. Please share with friends. |
Privacy Policy & Terms Of UseBy using our website, you expressly consent to our Privacy Policy and Terms & Conditions. All Patterns, images and instructions are copyright protected. |