|
|
|
|
| HOME SEW CRAFTS DECOR SHOP |
|
SCHOOL SPIRIT APPLIQUE
Page 2 |
| lessons holiday patterns craft patterns |

|
|
Page 2: directions |
DirectionsBefore you begin, prewash and dry the fabric and shirt. Do not use fabric softener. Iron as needed.1. Mark Sides For Cutting
NOTE: Perfect placement is not crucial. We enhanced the marks in the photos. Use washable fabric marker and/or make the marks on the wrong side (turn shirt inside out). |
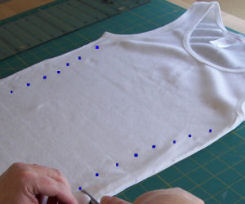 Make marks at even intervals along the sides of the shirt. We spaced ours 1" apart. We started and ended 1" from the edges; our center dot was 2" from the edge.
This will "nip in the waist" a bit. Use a large sewing ruler if you want to be sure you are spacing the dots equally.
Once your marks are made, you will make straight cuts from the edge to the mark.
Make marks at even intervals along the sides of the shirt. We spaced ours 1" apart. We started and ended 1" from the edges; our center dot was 2" from the edge.
This will "nip in the waist" a bit. Use a large sewing ruler if you want to be sure you are spacing the dots equally.
Once your marks are made, you will make straight cuts from the edge to the mark.
2. Cut Side Slits
|
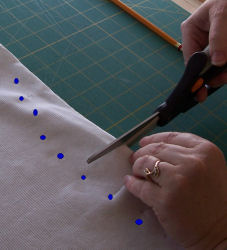 Cut a straight slit from the edge to each dot. The slits should be perpendicular to the side edge.
3. Cut Ties
|
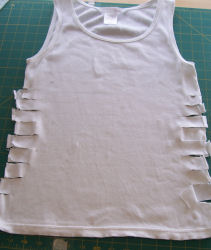 Cut each slit into two ties (cut through outer seam on each cut piece). When the shirt is finished, each set of ties will be tied together.
4. Cut "V" Neck
|
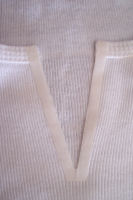 Cut a "V" in the center front of the neckline. Try on the shirt first to be sure you know how deep to cut the "v".
Iron 14" HeatNBond or other fusible web to the cut edges (or use fabric glue).
Cut a "V" in the center front of the neckline. Try on the shirt first to be sure you know how deep to cut the "v".
Iron 14" HeatNBond or other fusible web to the cut edges (or use fabric glue).
5. Attach Ribbon To "V"
|
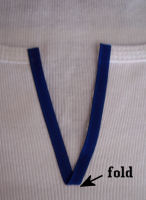 Following instructions on the fusible web package, attach the ribbon to the "v" opening. For our fusible web, we peeled off the paper
on the web, placed the ribbon on the web, then pressed down with a hot iron for the specified time. To create the "v" with the ribbon, place the
ribbon along one side first. Then fold the ribbon back up over the opposite side. The bottom edge of the ribbon will (at the base of the "v") will be a fold.
Following instructions on the fusible web package, attach the ribbon to the "v" opening. For our fusible web, we peeled off the paper
on the web, placed the ribbon on the web, then pressed down with a hot iron for the specified time. To create the "v" with the ribbon, place the
ribbon along one side first. Then fold the ribbon back up over the opposite side. The bottom edge of the ribbon will (at the base of the "v") will be a fold.
6. Add Applique To Shirt
|
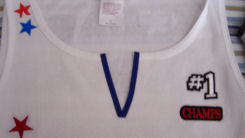 Use ready made applique, or create your own using one of the methods described above. Follow the directions on the package of ready made appliques, transfer paper and fusible web to create your appliques (or follow our instructions using the links provided above). Attach your appliques to the shirt front and back. Add glitter, paint, ribbon, glue-on "gems" etc.
|
|
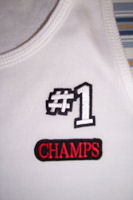 Ready made applique.
|
|
 Ready made letters.
|
|
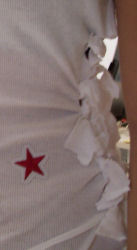 Side ties.
Quick Reference |
Learn To Paint!free video tutorialsVisit my youtube channel. Free videos with step by step instructions. Paint beautiful paintings for your home. |

Please ShareI rely on advertising to keep my site free. Please share with friends. |
Privacy Policy & Terms Of UseBy using our website, you expressly consent to our Privacy Policy and Terms & Conditions. All Patterns, images and instructions are copyright protected. |