|
|
|
|
| HOME SEW CRAFTS DECOR SHOP |
|
TWO GLASSES CASES
|
| lessons holiday patterns sewing patterns |

|
-> sewing patterns -> accessories
|
Set Of Two Glasses CasesFully Lined - nicely finished inside and outcolor coordinated |

Coordinated Glasses CasesI have two pairs of glasses. I HATE digging one pair out of the case and holding it while I put the other pair into the same case (such as when swapping sun glasses for regular glasses). Hard cases are too large and bulky to fit into my purse. Store bought cases don't suit my taste or don't fit my glasses. This set of cases is the answer! Made from coordinating prints, they make a nice set. Finished cases are approximately 4" x 6.5". No unfinished edges - nicely finished inside and out! |
Glasses Case SizeOverall size: Size approximately 4" x 6.5" These make up quickly, using fusible fleece. |
Supplies
Fabric
All seams are 1/4".
Other
I made the black & white print set several years ago, so decided to make a new pair of cases when updating this page in 2015. Some photos show my new case (photo at the top), and some show the old case (most of the instructions). |
USING ONE FABRIC FOR OUTER SHELL
If you wish to use this easy pattern, but want to make one case out of a single fabric, start at instruction #3. For supplies, cut the following:
|
LOOP CLOSURE
|
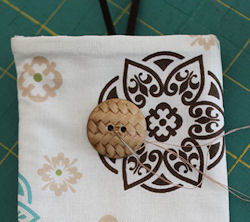 If you wish to add a loop and button closure to your glasses case (so glasses do not fall out of case), follow the directions provided for our cell phone cover.
DIRECTIONS
|
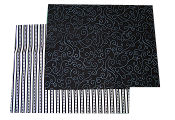 1. Cut two coordinating fabrics, each 9" wide by 7.5". Cut two pieces of lining, each 9" wide by 7". Cut two pieces
of fusible fleece, each 9" wide by 7".
1. Cut two coordinating fabrics, each 9" wide by 7.5". Cut two pieces of lining, each 9" wide by 7". Cut two pieces
of fusible fleece, each 9" wide by 7".
|
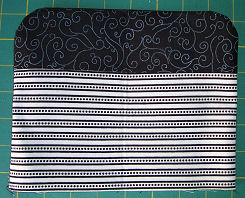
NOTE: The top section of my second black/white set was actually cut from a separate piece because I wanted the lines
to run in a different direction.
|
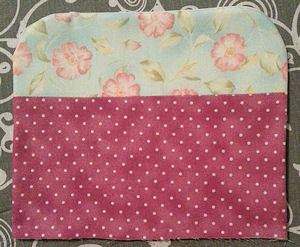
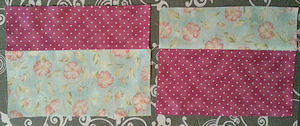 2. Lay one piece on top of the other, both right sides up. Cut across pieces, 3" from top. Separate the pieces.
Mix-match the two pieces so that the top section of one is now the top section of the other. Stitch pieces together,
right sides together. Press seams open. Finished block should
measure 9" wide x 7". If it's not exact, it's OK. Trim sides straight.
2. Lay one piece on top of the other, both right sides up. Cut across pieces, 3" from top. Separate the pieces.
Mix-match the two pieces so that the top section of one is now the top section of the other. Stitch pieces together,
right sides together. Press seams open. Finished block should
measure 9" wide x 7". If it's not exact, it's OK. Trim sides straight.

|
3. Fuse one piece of fusible fleece to the wrong side of each block. To fuse fleece: Place fusible fleece right side up on ironing board. Place fabric, right side up, directly on top of fleece. Press with iron (wool/steam setting). |
|
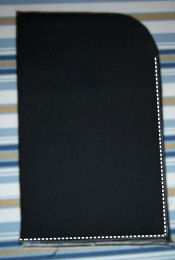
Place on working surface so that the fold is on the right. Use the rounded corner template to cut off the upper left corner (opposite to the folded edge). Repeat with lining piece. |
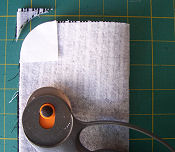 4. Fold fused block in half on vertical center (so that, when folded, it measures 4.5" wide by 7").
|
|
 5. Pin lining to block, right sides together. Stitch around three sides, using 1/8" seam allowance, leaving bottom (straight) edge open.
|
|
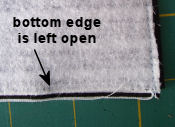
 6. Turn piece right side out. The fleece will be on the inside, between the outer layer and the lining. Press.
The bottom edge is open.
6. Turn piece right side out. The fleece will be on the inside, between the outer layer and the lining. Press.
The bottom edge is open.
|
In the photo, the stitch line has been enhanced.
CLOSURE
|
 7. Fold in half, right sides together. Stitch down the outer open edge and across the bottom, 1/8" from the edge.
Zig-Zag or serge across the bottom edge's seam allowance to help prevent fraying.
Turn right side out and press. The seam allowance down the inside outer edge will be very small and is now finished nicely.
7. Fold in half, right sides together. Stitch down the outer open edge and across the bottom, 1/8" from the edge.
Zig-Zag or serge across the bottom edge's seam allowance to help prevent fraying.
Turn right side out and press. The seam allowance down the inside outer edge will be very small and is now finished nicely.
Quick Reference |
Learn To Paint!free video tutorialsVisit my youtube channel. Free videos with step by step instructions. Paint beautiful paintings for your home. |

Please ShareI rely on advertising to keep my site free. Please share with friends. |
Privacy Policy & Terms Of UseBy using our website, you expressly consent to our Privacy Policy and Terms & Conditions. All Patterns, images and instructions are copyright protected. |