|
|
|
|
| HOME SEW CRAFTS DECOR SHOP |
|
EASY BACKPACK PATTERN
|
| lessons holiday patterns sewing patterns |

|
-> sewing patterns -> accessories
|
Page 2: finish bag |
Continued from page 1 |
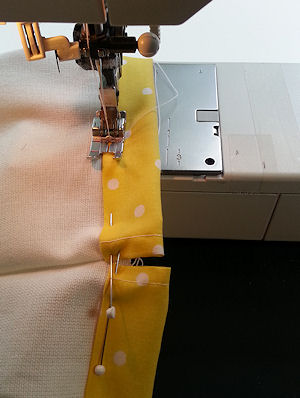
Stitch Bag SidesWithout Contrast Casing
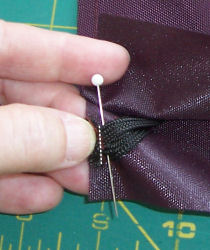
Fold the fabric to create a 1/4" hem on the wrong side, perpendicular to the snip. Stitch. See photo on right (stitching is enhanced). Repeat on the right side edge. Repeat steps 1 and 2 with the second bag piece. |
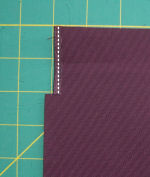 Place a main bag piece WRONG side up. Using a fabric pencil, make a small mark 2.25" from the top and 1/4" from the left side edge. Cut a horizontal snip from the edge to this mark. If you do not have a fabric pencil, mark the spot with a pin.
|
|
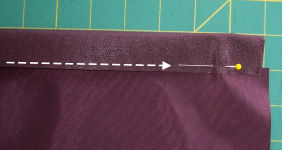 Fold down the top to the WRONG side so that the lower edge is about 1/4" below the notched area. Press. Pin hem into place. Stitch across. Do this for each bag piece. This will create a 1" casing at the top of each bag piece.
|
Start stitching at the top and STOP when you are 1" from the bottom. |
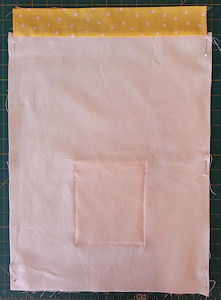
 Place the two bag pieces right sides together. Check to be sure they are the same size - trim sides or bottom as necessary. Stitch the sides, using 1/4" seam allowance.
Stitch Sides - With Contrast Casing
|
 Pin the bag sides together, right sides together, lining up the casing ends.
|
|
 Stitch the two side seams, leaving the lower 1" unstitched. Do not stitch across the bottom. Your side seam stitching needs to be right up next to the casing, without stitching into the casing.
|
Turn the backpack WRONG side out. |
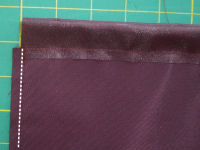
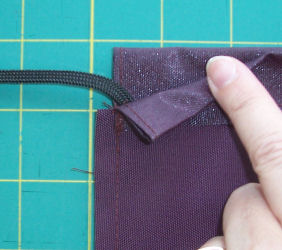
 Turn backpack right side out. Fold down the casing pieces to the right side of the backpack. Pin into place. Stitch into place, close to the edge of the casing. Stitch on the RIGHT side of the bag.
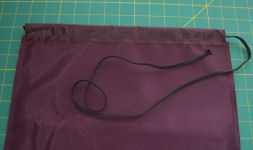
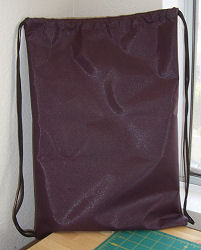
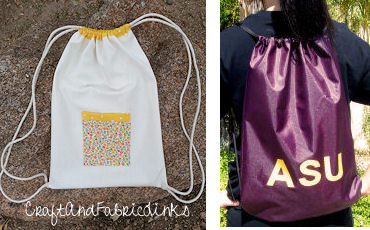
Thread The Cording To Create DrawstringsCut two 64" pieces of cording. I used flat, black cording for my college bag (the maroon bag shown in the photo), and 6/32" cotton piping cord for my pocket backpack. Zig-zag or straight stitch across each end of cord, close to the end (this helps prevent fraying). Lay down the bag, still inside out. Take one 64" piece of cording and pin one end to outer edge of the bottom bag piece, 1" from the bottom left hand corner. The cut edge of the cording should be toward the outer edge of the bag piece. Stitch across the cording, close to the edge to secure the cord end in place. The cording photos feature my college bag (with ASU letters). |
|
|
 Run the cord up through the inside of the bag and out the top of the bag.
|
|
 Run the cord through the top layer casing from the left side, through the casing and on out the right side. Push the cord in short bursts. If you have trouble, attach a safety pin to the end of the cord and feed it through the same way you would pull elastic through a casing. I found that short bursts worked well.
|
|
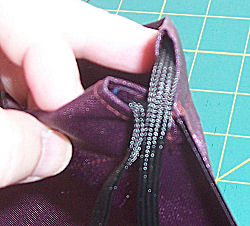 Run the cord through the bottom layer casing from the right side, through the casing and on out the left side. The photo on the right shows the cord coming out of the right side of the upper casing and feeding into the right side of the bottom casing.
|
Stitch the remaining open area of the side seam. |
 Pull the cord down through the inside of the bag and place the end just above the first end. Stitch into place. Stitch back and forth a couple of times for added strength.
|
|
 Repeat with the opposide side of the bag, threading the cord in reverse. Start at the lower right corner, bring the cord up through the inside of the bag, through the upper casing from the right to the left, around and through the lower casing from the left to the right, out the right side of the lower casing and back down through the bag to the lower right corner. Stitch the remaining open area of the second side.
|
Stitch across the bottom of the backpack. I serged across the bottom of my bag for added protection against fraying. Turn the backpack right side out.
|
|
Page 2: finish bag |
Quick Reference |
Learn To Paint!free video tutorialsVisit my youtube channel. Free videos with step by step instructions. Paint beautiful paintings for your home. |

Please ShareI rely on advertising to keep my site free. Please share with friends. |
Privacy Policy & Terms Of UseBy using our website, you expressly consent to our Privacy Policy and Terms & Conditions. All Patterns, images and instructions are copyright protected. |