Pocket Tissue Cover
Personal Size Tissue Cover
nicely fitted corners
originally on our previous site: CraftAndFabricLinks.com
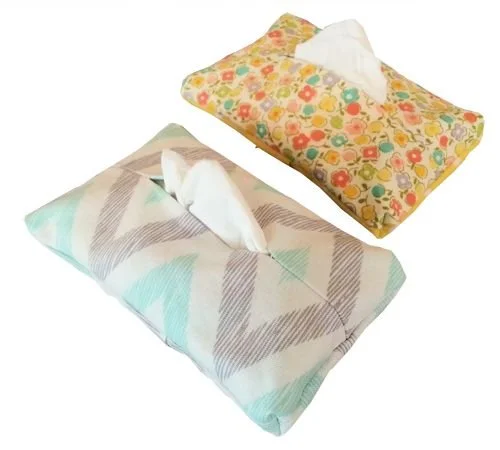
Use your favorite fabric scraps to make covers for small tissue packages. Mix and match fabrics, use holiday fabrics, or choose a theme. These covers are easy and fun to make. Fabulous as stocking stuffers at Christmas, or give as a special little gift. Add embroidery or other embellishments to dress them up in your own unique way. Adjustable pattern sizing.
Disclosure: This site contains affiliate links. As an Amazon Associate, I earn from qualifying purchases. Clicking on links, and purchasing products, may result in the seller paying us compensation - at no extra cost to you. Affiliate links are in green.
Also see:
Notes From The Workroom & Trail
Accessories
Craft Projects
Easy Sewing Patterns
Tissue Cover Size
My instructions create a cover that fits over a small package of tissue: 2.5” wide x 1” depth x 4.5” long.
Convenient envelope back opening allows easy insertion of tissue package.
All seams are 1/4”.
Size Variance: how to make adjustments
Tissue package sizes vary. I recently bought a batch of packages that are smaller than the size just listed. Here’s how to compute the size for both top and bottom:
Top Width: measure the circumference of the package (all the way around the width of the package). Divide by 2. Add 1/2” for the seam allowances (each seam allowance is 1/4”).
Top Length: measure the circumference of the package lengthwise (all the way around the long way). Divide by 2. Add 1/2” for seam allowances.
For the bottom, just add 2” to length for creating the back opening, then cut the piece across the width, about 1/3 of the way from one end.
EXAMPLE: Let’s say your package measures 2.5” x 1” x 4.25”. The circumference around the width would be 7”. Divide 7 by 2, ; then add 1/2”. The width of the top of the fabric needs to be 4”. The circumference the long way is 10.5”. Divide that by 2; then add 1/2” for seam allowances. Therefore, the front pieces will be cut to a length of 5.75”. The top piece needs to be 4” x 5.75”.
One back piece will be cut to 4” x 2.75” and one will be cut to 4” x 5”.
Remember to cut the top pieces slightly wider, and then trim to fit once they are stitched together. See step 4 below..
Supplies
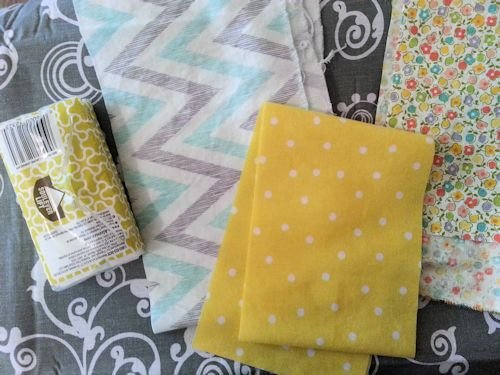
Fabric: for my package that measured 2.5” wide x 1” depth x 4.5” length
Two pieces: each 4.5” x 6.5” for cover top
Two pieces: one 2” x 4”, and one 6” x 4” for cover bottom (I used contrast fabric for the bottom)
NOTE: These pieces are a bit larger than what they need to be when finished, but they will be trimmed down later.
Other
thread to match background of fabric
large sewing ruler (optional but nice to have)
scissors or rotary cutter
pins
fabric marker or pencil (optional but nice to have)
Pre-wash, Dry, & Press Fabric Before Using
If you plan to wash your pocket tissue cover in the future, you will need to pre-shrink the fabric before using. Cotton fabric (such as quilt fabric) shrink.
Directions
Create Cover Top

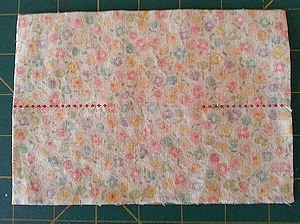
1. Place your two cover top pieces right sides together. Using a sewing ruler, draw a 2” line, lengthwise, from the end. The lines should be in the center of the fabric. I have enhanced the lines in the photo (red line).
2. Stitch along lines marked. Be sure to back-stitch at each end of stitch lines. I have enhanced the stitch lines in red.
3. Fold down the top layer on the upper half, folding along the stitch lines.

fold down top layer along the stitch line
Press. There will be three layers on the bottom half now (and one on the top half).
4. Flip the piece over, and place it so that the three layers are on the top half. Fold down the top layer on the upper half just as you did on the other side. Press. You now have a cover top that has an opening in the center of the tissue. The opening is nicely finished.
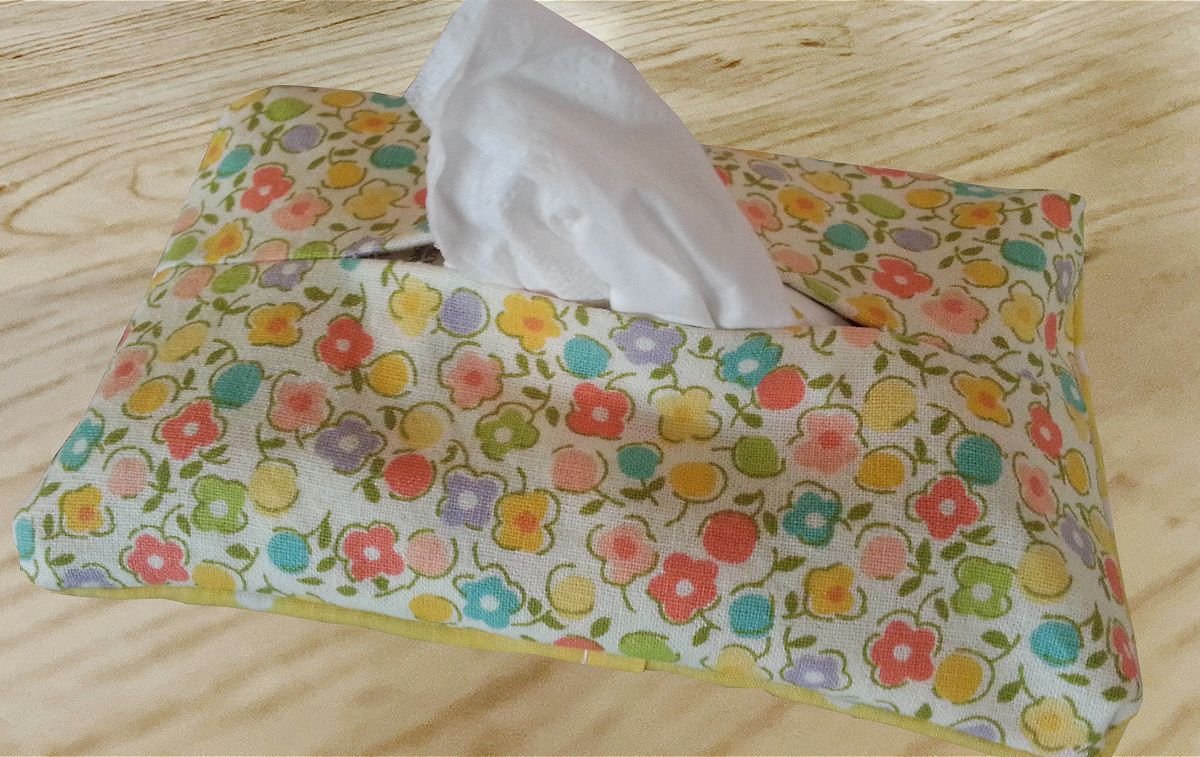
The following two photos show finished pocket tissue cover tops.


TRIM the cover top to 4” x 6”.
Trim evenly. For example, if you need to trim 1/4” from the length, trim 1/8” from each end. The opening for the tissue must remain centered. Use a quilter’s square to assist you in creating straight cuts.
You now have a finished top, with a finished opening for the tissue. Your finished top piece should be 4” x 5”.
This is a clever design that is easy, and makes for a nice finish!
Create Cover Bottom
1. Press under 1/4” on one side of a cover bottom piece to create a 1/4” hem. Press and stitch the hem. Repeat for the other piece. You will now have two bottom pieces, and one finished top piece.
2. Place one bottom piece right sides together with the top piece, aligning the lower unhemmed edge of the bottom piece with the lower edge of the top piece.
NOTE: my piece shown in the following photo has not yet been trimmed to 4” x 6”.

3. Place the other bottom piece right sides together with the top piece, aligning the top unhemmed edge of the bottom piece with the upper edge of the top piece. Pin into place. Stitch all the way around, using a 1/4” seam. I have enhanced the stitch line.

4. Trim the corners, being careful to not slip through stitching.

Finish Your Tissue Package Cover
At thsi point, you can turn the cover right side out and insert your tissue package, OR you can add mitered corners. Mitering the corners makes for a nice, sharp corner, rather than having excess fabric at the corners. I use this method when making my mitered cushion cover. Refer to that tutorial for more thorough instructions on mitering.
1. Add Mitered Corners
Pull out the corners, lining up the side seam with the end seam. Stitch across. Refer to mitered cushion cover for excellent photo on this process. Refer to the photos below as well. The seams have been enhanced in red.


inside out
2. Turn right side out. Insert your tissue package through the back opening.

Finished! How cute is this! Adorable little mitered corners for a perfect fit!


Accessory Patterns


Articles & Tips


Use double sided pre-quilted fabric to create this roomy tote with pockets. Multi-use bag.