Bird Cage Cover
Your bird can sleep at night in privacy.
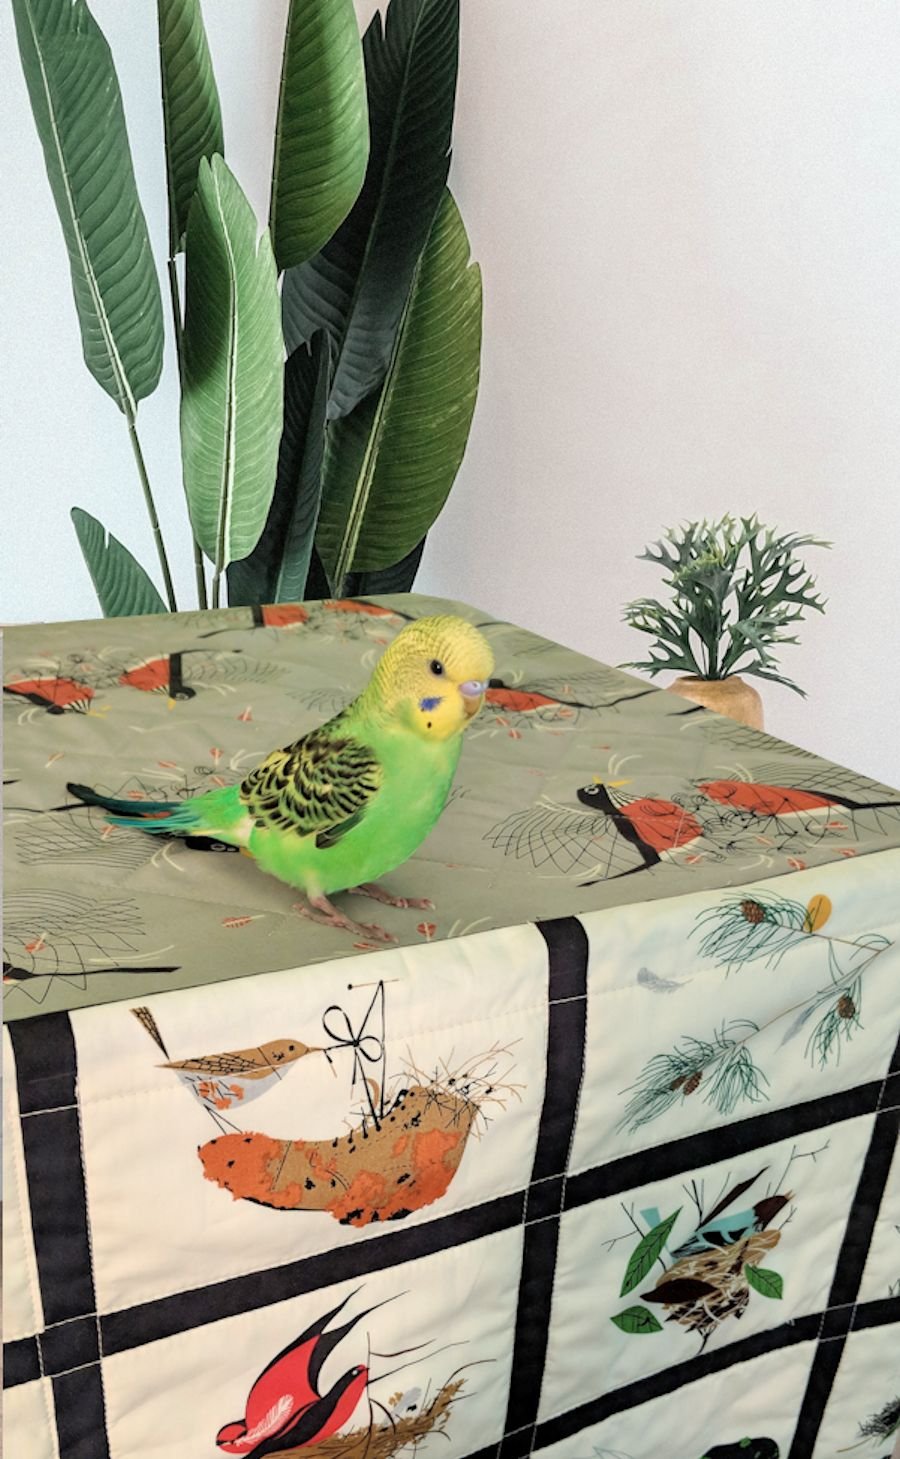
Credit: The photo of the finished cover was generously donated by Tonya W. She used our pattern, and created a gorgeous cover. I see a happy bird!
This pattern was first posted on our previous site, CraftAndFabricLinks.com, in 2008. It was a popular pattern, so we are happy to provide it on our new site.
Disclosure: This site contains affiliate links. As an Amazon Associate, I earn from qualifying purchases. Clicking on links, and purchasing products, may result in the seller paying us compensation - at no extra cost to you. Affiliate links are in green.
Also see:
Tips & Articles
Applique
Quilt Patterns
Animal & Pet Theme
Free Craft Projects
Bird Cage Cover

Your bird can go to sleep in privacy with this easy-to-make bird cage cover. The sides are made as four separate panels that can be individually lifted. The panels overlap around corners to prevent corner gaps. Quick and easy to make. One or more panels can be lifted in the day, or the entire cover can be removed.
Why use a cover?
Without a night cover, your bird is exposed to light. A cover allows a quiet place for comfortable sleep.
NOTE From Tonya W: “I used your directions exactly but then I quilted it.”
We love her cover! I replaced my original photos with photos of her cover.
All seams are 1/4”
Pre-wash, dry & press fabric before using
GENERAL SUPPLIES
Your fabric will shrink, so pre-wash, dry and press before using if you plan to wash your project in the future.
Iron between each step. Read through all directions completely before beginning.
Cutting Tools
I recommend the following tools for cutting. I use these tools for most projects. They allow for easy, precise cutting.
rotary cutter
cutting mat
large sewing ruler
Other Sewing Supplies
thread to match fabric background
sewing scissors
pins (I use quilting pins)
PROJECT SUPPLIES
Fabric
Measure the front, two sides, back and top; add enough for seam allowances, hems and overlap at corners (see next section about overlap).
Measure Cage For Fabric
I used a 1/4” seam allowance, 1” hem, and 1/4” extra on each side of the panels for hemming the sides of the panels. I also added 1/2” on one side of each SIDE panel for overlapping around one corner. The FRONT panel has an extra 1/2” on both sides - for wrapping around two corners. The BACK panel does not have any overlap. The TOP is cut to exact measurement plus 1/4” seam allowance plus 1/4” for extra room.
EXAMPLE
Front 36” wide x 24” high
The width would be: 36” plus 1/2” plus 1/2” (1/2” is added to both sides of the front so the front can overlap the side corners on each end) plus 1/4” plus 1/4” (hem on each side of the front panel). The total width of the front piece would be 37.5”
The height of the fabric would be: 24” plus 1/4” seam allowance (the only seam allowances are at the top, where the panels are sewn to ghe top piece of the cage cover) plus 1” for the hem. The total height would be 25.25”. So, I would cut the piece 37.5” x 25.25”.
Top 36” x 30”
36” plus 1/4” plus 1/4” (seam allowance on each end) plus 1/4” plus 1/4” (added room on each end). The total length of the top piece would be 37”. The width would be computed the same way, and the total width would be 31”. I would cut my top piece to be 37” x 31”.
Side 30" wide x 24" high (two sides)
The side is computed like the front except that the 1/2” overlap is added only to the side that will wrap around the corner to the back. Therefore, the length would be: 30" plus 1/2" (one overlap) plus 1/4" plus 1/4" (hem on each end of the side panel). The total length of the side piece would be 31". The height would be computed the same as the front piece. It would be 24" plus 1/4" seam allowance plus 1" hem on the bottom. The total height would be 25.25".
Back 36” wide x 24” high
The back is cut to fit, plus 1" hem on the bottom, plus 1/4" seam allowance at the top, plus 1/4" hem on each side. The total back dimensions would be: 36.5" x 25.25". The back is not as wide as the front panel because it does not include any overlapping edges.
The following diagram shows the placement of the four panels. For clarity, the top is now shown. The dimensions shown are the original bird cage dimensions, without overlap. The front overlaps around the corner over each side, and the sides overlap around the corner to the back (over the back). This means that light will not come in through the corner openings of the panels.

DIRECTIONS
Remember: all seams are 1/4”
1. Measure your bird cage. Compute the dimensions needed for your four panels plus the top. Refer to directions above for computing measurements.
2. Cut out your top piece and four panels.
3. Serge or zig-zag around all four sides of all pieces.
4. On each panel, turn under 1/4” on the two vertical sides (to create a hem on each side). Stitch side hems.
5. Turn under 1” on the bottom of each of the four panels. Stitch bottom hems.
NOTE: It is extremely important that you sew the panels on in the correct order. You will start with the top. Lay down the top, right side up. Then pin and sew the panels according to the directions below. The panels will be sewn to the top, right sides together, with the top edge of each panel pinned to the side edges of the top piece. Be sure that you pin the correct panel to the correct side of the top. For example, the FRONT and SIDE panels in our example must be pinned to the long sides of the top piece; the side panels would be pinned to the short sides of the top piece.
LAYER AS FOLLOWS:
The pieces are layered as follows: first pin and sew the FRONT piece, then the two SIDE pieces, then the BACK piece. The back is last because it will then end up on the inside (under) all other pieces.
6. Pin / Sew Panels
Pin the FRONT panel so that the overlap ends go around the corner on each end.
After the front is sewn into place, pin and sew the two side panels into place. Last, pin and sew the back panel into place.
Refer to the following photo. The blue check fabric is the right side of the TOP. A panel is being pinned right sides together to the top. When stitched in place, and the cover is turned right side out, the panel will go around the corner.

7. Turn the bird cage cover right side out and place it over the cage. Enjoy!

More Animal & Pet Projects
Don’t toss the cat tree - replace the rope!

Make an adorable cat pillow for baby’s room.
Pet Projects


Easily replace the rope on a cat tree. Don't toss the tree - replace the rope.