Puff, Powder and Lotion
Powder puff pattern, powder and lotion recipes
originally on our previous site: CraftAndFabricLinks.com
My grandmother always used her own cornstarch mix for powder. I decided to do the same. I also love my home made lotion. I use natural oils and healthy ingredients.
Disclosure: This site contains affiliate links. As an Amazon Associate, I earn from qualifying purchases. Clicking on links, and purchasing products, may result in the seller paying us compensation - at no extra cost to you. Affiliate links are in green.
Also see:
Notes From The Workroom & Trail
10 Easy Sewing Projects
10 Simple Stress Busters
Crafts
Organic Body Powder with Hand Made Powder Puff
I love body powder, especially in the hot, humid months of summer. There is nothing quite as luxurious after a bath or shower than to dust silky powder over one's body.
I am very particular about what I put in my body, so why not extend that concern to what goes onto my body? I decided to make my own, super soft powder puff to go with home made, all natural powder.
My grandmother loved cornstarch. She had sensitive skin, and taught me from early on that cornstarch worked better than anything for keeping one dry in hot, sticky weather. So - in memory of her wise words - I created my own body powder using cornstarch and arrowroot powder.
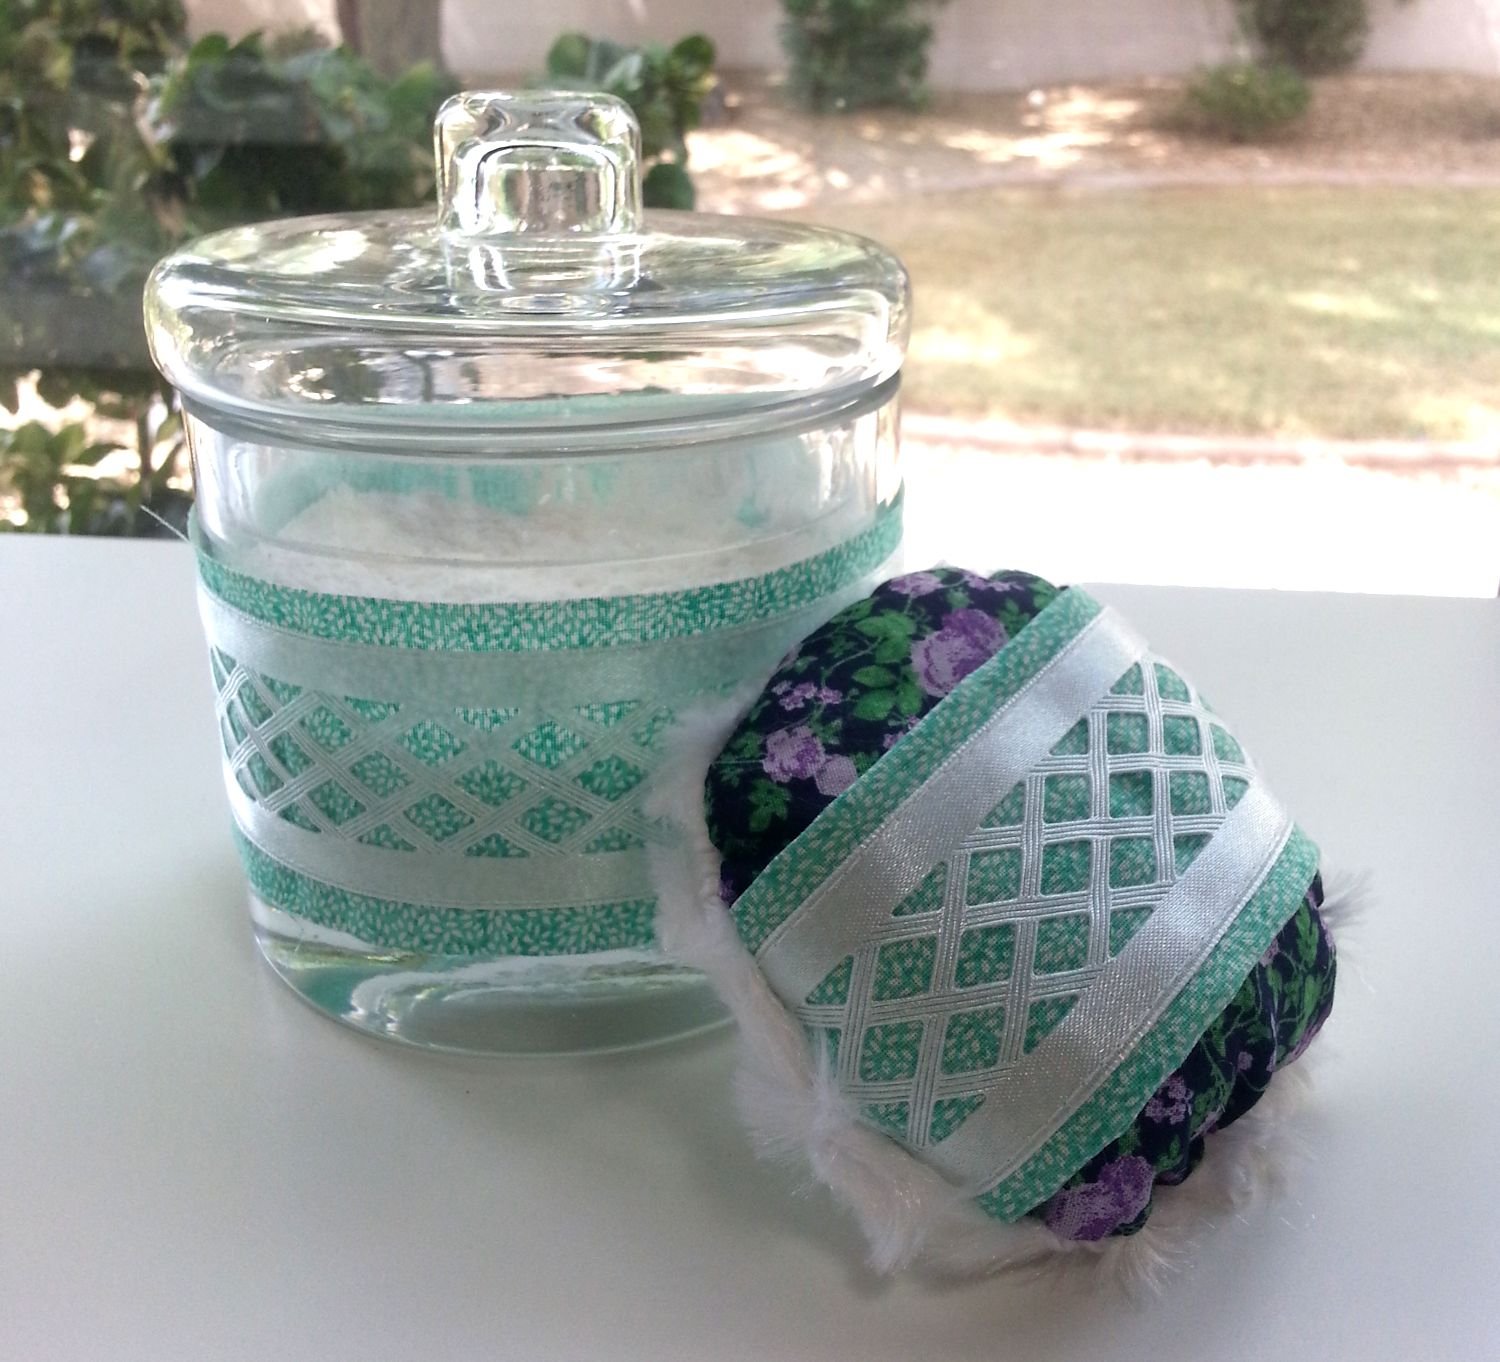
To make this even more heavenly, I added my own powder puff. I chose some of my favorite fabrics (from my numerous scraps), added ribbon and super soft "furry" fabric, then stuffed it. Very pretty, and just what I need on a stressful day.
NOTE: Organic vs All Natural
The ingredients I used were natural, meaning that there were no artificial ingredients (such as food coloring or chemical perfumes). The cornstarch I used was all natural (pure cornstarch) but was not certified organic, so my powder is "all natural" but not organic. Look for "certified organic" for your powders.
Warning: There are no preservatives in this product; therefore keep it sealed and use it in a timely manner. Check with your doctor before using any product on your skin. Essential oils can cause allergic reactions in some people. We are not responsible for any adverse reactions.
SIZE
I recommend that you decide on the powder container as your first step. That will determine the size of powder puff you will need. I chose a glass jar. I used that jar as a pattern for my powder puff. The puff should fit inside the container nicely - not too tight.
SUPPLIES - powder puff
Adjust amounts for your project - these amounts were for my project.
PROJECT SUPPLIES

Container With Lid: - glass jar, cardboard box, tin container - your choice
Fabric Puff Top: - large enough piece to cut the powder puff top - mine was a 4.5" circle
Fabric Puff Bottom: - plush "fur" or minky type fabric for the side that will contain the powder. Some people use terry cloth. I prefer softer fabric.
Puff Handle: - the band with ribbon is the handle. I can slide my hand between the puff back and the handle, or hold the band while applying the powder. Fabric for the band should be cut as follows. Length: width of the puff plus 1/2" for seam allowance; Width: 4.5" (it will be folded over)
Ribbon: - 1.5" wide decorative ribbon (long enough to run across your puff)
Stuffing: the puff will be stuffed
Jar Fabric & Ribbon: 1.5" ribbon and 2" width fabric - equal to the circumference of the jar
Scissors, Pen or Pencil & Paper: - will be used for pattern drawing
Glue Stick or Glue Gun: - for attaching the fabric to the jar
GENERAL SEWING SUPPLIES
sewing scissors
quilting pins
large sewing ruler
fabric marking pencils
seam ripper
rotary cutter and mat (optional but nice)
Safety Reminders For Little Helpers
A. Always have an adult do all the ironing!
B. Never run with scissors. Carry them pointed end down.
C. Never use a sewing machine without adult supervision.
D. Always let an adult use the seam ripper for you.
Recipe: Relaxing, Organic Body Powder
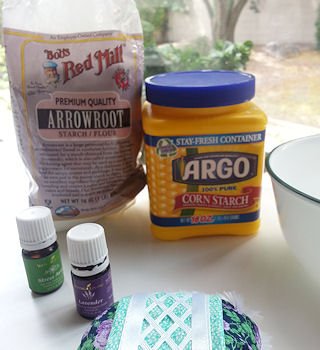
1/2 cup Arrowroot Powder
1/2 cup Cornstarch
Essential Oils of your choice - I used approximately 10 drops of lavender and 5 drops of "Stress Away", both by Young Living. I recommend lavender for relaxation. Your local organic or health food store should be able to help you find good oils for your needs or desires. The internet is a good place to research and locate suppliers of essential oils.
NOTE: Optional - use 1/3 cup of each of the above powders, plus 1/3 cup bentonite clay or kaolin clay
Mix powders in a mixing bowl. Add essential oils a drop at a time. Stir with fork. Place into jar or powder container of your choice. Cover with lid.
DIRECTIONS - powder puff
use 1/4" seam allowance
Iron between each step. Read through all directions completely before beginning.
1. Draw Pattern
Use your powder container to draw a pattern for your powder puff. Trace around the base of the container.

2. Cut Puff Fabrics
Using the pattern you created, cut one each of puff backing and puff "fur".
3. Make Puff Handle
Cut a piece of handle fabric, long enough to fit across the puff, and 4.5" wide. Press in half, right sides together, lengthwise. Press. Unfold, and place the ribbon so that it is 1/4" above the fold line. Stitch the ribbon to the fabric. I stitched one line, close to the edge, on each side of the ribbon (at the location of the pins).

Fold the handle again right sides together. Stitch the open, long side, using 1/4" seam allowance. Turn right side out. Press.
Place the handle on the right side of the puff back, centering the handle across the puff back. Both the back and the handle should be right side up.

4. Stitch Powder Puff
Place the fur, right side down, on the puff back. Pin the fur to the puff back, right sides together. Stitch around the perimeter, using a 1/4" seam allowance. Leave 3" open for turning.

5. Finish Powder Puff
Turn the powder puff right side out. Stuff the powder puff with stuffing of your choice. Slip stitch the opening closed, using tiny stitches.

6. Decorate Jar

To decorate my jar, I cut fabric 2" wide, and long enough to go around circumference of the jar. I cut the ribbon to the same length. I stitched ribbon to the right side of the fabric. I used just a dot of glue on each end of the fabric / ribbon piece to adhere it to the jar (where the ends came together on the back of the jar).
My puff fits nicely inside my powder jar. I can place the lid on the jar, with my puff inside. As an alternative, you can keep a small candy dish next to your powder jar for storing your puff. It's important to keep the powder jar covered with the lid. The photo shows my puff in the jar of powder.
Healthy Lotion with Essential Oils
Aromatherapy
Aromatherapy is the art of using the essential oils of plants to achieve emotional and physical well being. Essential oils are said to have a wide range of qualities, such as antiseptic, muscle soothing, and skin rejuvenating to name a few. There are several good sources for information on the various qualities of different oils. Sources can be found on the internet or your local library. Do your research, and decide which oils are best for you.
NOTE: See a dermatologist or doctor of naturopathy before using essential oils if you have any skin conditions or allergies.
GENERAL RULES WHEN WORKING WITH ESSENTIAL OILS:
Essential and perfume oils vary in strength depending upon method of extraction. A general rule is that more expensive oils are purer. Adjust quantity to your personal taste.
Essential oils are extremely concentrated. NEVER use them undiluted directly on the skin. Keep all oils and perfumes away from the eyes. Do NOT ingest. Work in a well ventilated area for a limited time.
Ingredients & Supplies: Refreshing Citrus Lotion
Essential Oils
I chose lemongrass, grapefruit and sweet orange essential oils for the beneficial effects they are said to have on the skin. Essential oils have been used for hundreds of years, and their qualities are well known to aromatherapists.
lemongrass: antiseptic, reduces aches and pains
grapefruit: astringent, detoxifier
sweet orange: disinfectant, enhances skin
Other Materials & Ingredients
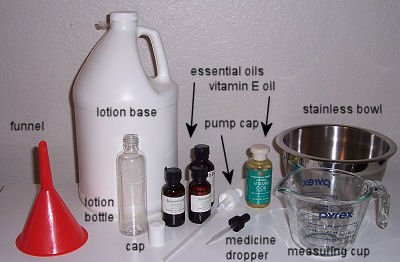
unscented lotion base ** (good quality, unscented lotion)
vitamin E oil (plus any other vitamin oils you are using, such as A or D)
large non-porous bowl *
large non-porous spoon
lotion container
cap (pump type or regular)
medicine dropper
funnel
* stainless steel or glass
Ready Made Lotion Base
I use a good quality base that contains aloe vera and vitamin D. You can add aloe vera gel (use good quality pure aloe vera). The reason I use a ready made base is that it is mixed nicely and contains preservative. Choose a base that has a preservative that you are comfortable with. Without preservative the lotion will mold and grow other impurities. Natural preservatives are available, so read the ingredients list. Research the ingredients or contact the seller if you need further information.
Computing Amounts Needed
I use 5 drops each of the essential oils to each 12 oz. (1.5 cups) of lotion that I am making, and I add approximately 8 drops each of vitamins E and A depending on the lotion base that I am using (some bases contain a nice amount of vitamins E and A already).
I usually make my lotions in large batches. Adjust the amount of essential oils and vitamins according to the amount of lotion base you are using. For example, my lotion bottles hold 4 oz. (1/2 cup)of lotion. 15 bottles would be 60 oz., or 5 times the amount needed for 12 oz. To make 15 bottles, 1/2 cup each, use 25 drops of each essential oil, mixed into 60 oz. of lotion base (7.5 cups). Add approximately 40 drops of vitamin E oil.
I purchase my lotion base in a 1 gallon container, which is 128 oz. This is enough to make 32 4-oz. bottles of lotion, or 16 8-oz. bottles of lotion, or 10 12-oz. bottles of lotion (with a bit left over). If I used 1 full gallon of lotion, I would need 50 drops of each of my essential oils. I have found that I get about 150 drops of essential oil per 1/4 oz. of oil.
DIRECTIONS - Lotion
Wash hands and work in a clean area.
1. Pour lotion base into bowl.
2. Using the medicine dropper, add the appropriate amount of drops of each essential oil and mix.
3. Use the funnel to pour the mixed lotion into the lotion container(s).
NOTE: Keep your lotion making supplies separate from food preparation supplies. In other words, do not prepare food in items used for lotion making. I store my lotion making measuring cups, bowls, and other items in a box in my craft area.
Create A Label
Purchase water proof labels for ink jet or use a laser printer to print your labels. Create your labels in a text or graphics program. I used Paint Shop Pro to create my graphic layout, then printed to water proof labels.
If you cannot obtain waterproof labels, paint over your labels using a clear varnish. It is important that your labels be waterproof.
Information To Include On Label
Your label should list ALL ingredients. This would include the ingredients listed on the lotion base, as well as any essential oils and vitamin oils you added.
Sample Label Information:
Citrus Blend Body Lotion (or your name for your lotion)
With Pure Essential Oils
Grapefruit, lemongrass & sweet orange pure essential oils, plus aloe vera and vitamins A, D & E.
The next area would list ALL ingredients of the base lotion.
Relax with your new, healthy, home made powder and lotion!
Inspirational Articles


Accessory Sewing Patterns


What drives us to DIY? Remind me again why I took this on? I have the answer.