|
|
|
|
| HOME SEW CRAFTS DECOR SHOP |
|
DRAWSTRING BEACH BAG
|
| lessons holiday patterns sewing patterns |

|
-> sewing patterns -> accessories
Drawstring Beach BagDesigner: Christina Sherrod
Quick & easy! This mesh bag allows air to flow through. It's perfect for carrying sea shells, wet swimsuits, sandy beach toys, etc. Make several - use different fabrics for the trim. The bag contains one drawstring.
Also see:
|
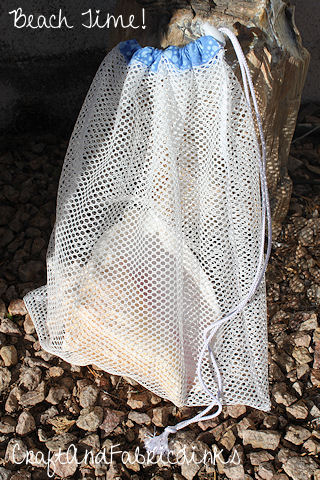 perfect bag for shells, flip flops, wet swimsuits
Drawstring Beach Bag SizeThe finished size of the beach bag is 16" high x 14" wide. Change dimensions to suit your needs. Supplies
One piece of mesh, measuring 32" long x 14.5" wide. 1 yard of mesh that has a width of at least 32" is enough to make two beach bags. Cut side by side, you would use 29" of the yard. One piece of casing fabric, measuring 2.5" x 30" (for top trim) One piece of 3/4 inch nylon cording measuring 52" (shorten or lengthen to suit your needs) One cord pull (see step 4) Sewing Supplies
thread
|
DirectionsAll seams are 1/4"1. Prepare Top Trim
|
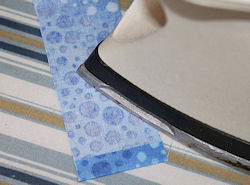 Press under 1/4" on one short end of the casing fabric piece to create an end hem. Stitch the hem.
|
|
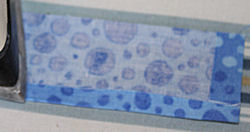 Press under 1/4" on one long side of fabric trim piece. Unfold.
|
|
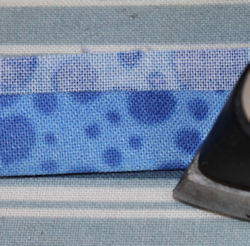 Fold the trim wrong sides together so the pressed edge comes 1/4" from the unpressed edge. Press. This step can be omitted, but it helps fold the casing around the top of the bag when it is time to sew it into place (later step).
2. Stitch Main Bag Sides
|
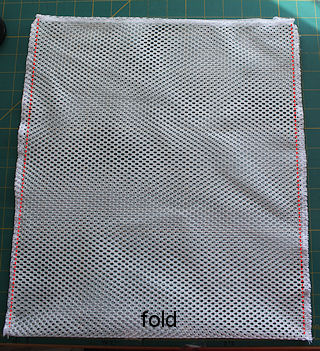 Fold the mesh cross-wise, right sides together (there might not be a right and wrong side). Stitch the sides, using a 1/4" seam allowance. The stitch lines are enhanced in red in the photo. Leave the bag inside out.
3. Create Casing
Stitch the casing to the bag, using a 1/4" seam allowance. The casing is a bit too long. That's OK at this point. This allows room for adjustment (better too long than too short!). |
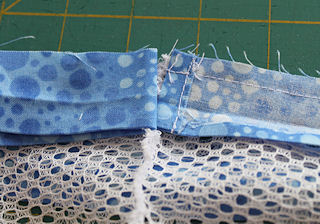 Pin the casing to wrong side of the bag, all the way around the bag, aligning top edges. The right side of the casing is pinned to the wrong side of the bag. Align so that the pressed edges of the casing align with the starting side seam.
|
|
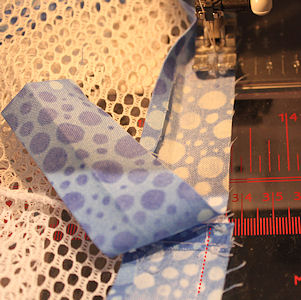 Here is another view of stitching the casing.
|
|
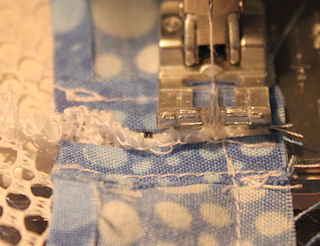 Trim the casing to fit, leaving 1/4" for end casing hem. Turn under, press, stitch. Stitch the remaining casing to the bag. The ends of the casing should come very close to one another, with just the seam allowance of the bag between them.
|
|
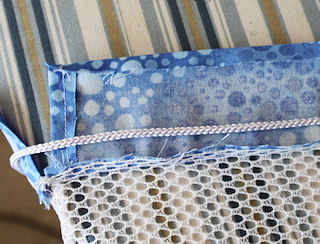 Turn the bag right side out. Press the bag so the upper bag edge lies flat, toward the casing. Fold the casing to the outside of the bag, so that the folded edge covers the seam allowance at the top of the bag. Pin all the way around. The photo shows the nylon cord already inside the casing. You can place the cord inside the casing before the casing is stitched down, or you can feed it through the casing after the casing is stitched down.
|
|
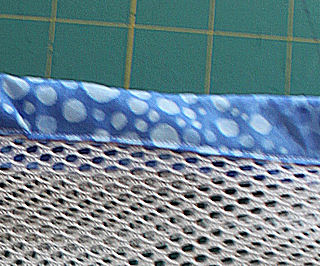 Stitch the casing into place, close to the edge of the casing.
4. Attach Cord Pull
|
 Run the cord ends through the cord pull. Push down on the top and bottom of the pull as you feed the cord ends through. The photo shows one cord end through the pull.
|
|
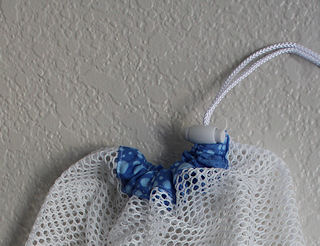 The the ends of the nylon cord together. Push in the ends of the pull to slide it up the cording to close the bag.
Quick Reference |
Learn To Paint!free video tutorialsVisit my youtube channel. Free videos with step by step instructions. Paint beautiful paintings for your home. |

Please ShareI rely on advertising to keep my site free. Please share with friends. |
Privacy Policy & Terms Of UseBy using our website, you expressly consent to our Privacy Policy and Terms & Conditions. All Patterns, images and instructions are copyright protected. |