DIY Pre-quilted Fabric

This lesson comes from our former site, CraftAndFabricLinks. Same owners - new site.
Also see:
Articles & Tips
Easy Sewing Patterns
Sewing Lessons
Home Improvement Projects
DIY Pre-quilted Fabric: double sided quilted fabric
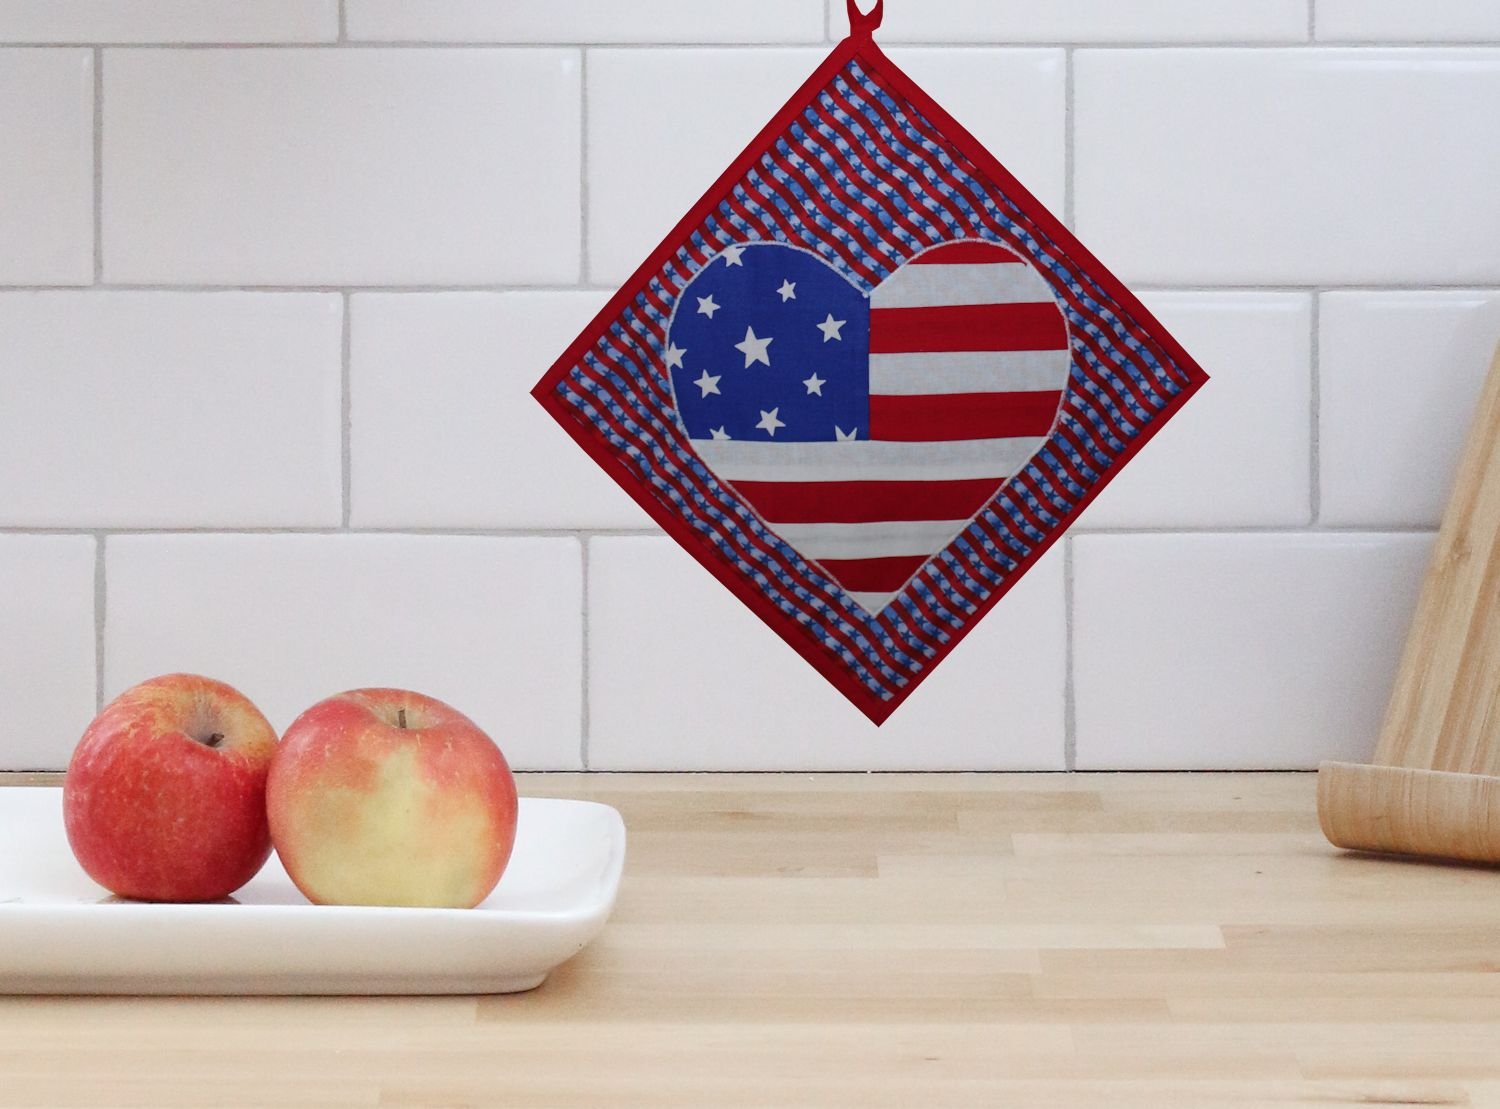
Use for tote bags, hot pads, placemats & other items.
Pre-quilted fabric is made up of two layers of fabric, plus a bit of padding in between. It can be a bit expensive - when you can find it. Both sides are the “right side”, so it can be used to create totes, appliance covers, placemats, and many other items. All you have to do is finish the cut edges.
Can’t find pre-quilted - OR you would rather make your own? It’s quite easy, with the right tools.
NOTE: I took this lesson from my previous site: CraftAndFabricLinks.com. We are moving content from that site to this one.
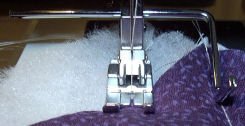
Edge Guide / Quilting Bar
A quilting bar (also called edge guide) greatly assists in this project. If you don't have one, don't panic. Although an edge guide means less work, pre-quilted fabric can be made without one.
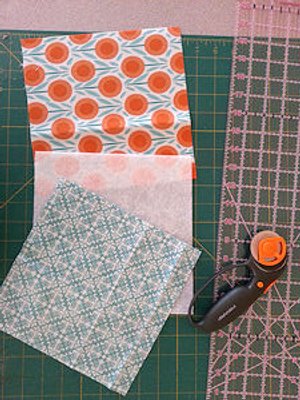
SUPPLIES - for one 8.5” square (adjust size as needed)
A quilting bar (also called edge guide) greatly assists in this project. If you don't have one, don't panic. Although an edge guide means less work, pre-quilted fabric can be made without one.
Top Fabric: A piece of fabric in the size you need (or one full yard if you wish to make one yard of double sided prequilted fabric)
Opposite Side Fabric: A piece of fabric in the size you need (or one full yard if you wish to make one yard of double sided prequilted fabric)
Batting: Same size as fabric pieces
Quilting Bar: (sometimes called edge guide). Refer to the ad below. The quilting bar assists you when stitching so your your rows remain straight and evenly spaced.
Other
thread to match your fabric, or embroidery thread for a decorative touch, or contrast thread
large sewing ruler (optional but nice to have)
scissors or rotary cutter
pins
fabric marker or pencil (optional but nice to have)
supplies
Pre-wash, Dry, & Press Fabric
If you plan to wash your prequilted fabric in the future, pre-shrink the fabric before using. Cotton fabrics (such as quilt fabric) shrink; pre-wash, dry and press before using.
DIRECTIONS
Set Up Your Sewing Machine
Attach your quilting bar to your needle arm, following instructions for your machine.
Alternative if you do not have a quilting bar:
If you do not have a quilting bar, you can still do this project. You will need to measure and draw lines an equal distance from one another. A quilting bar takes away this time-consuming step.
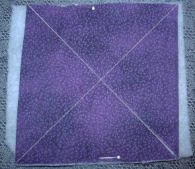
Mark Fabric - Square Fabric
Layer your fabric pieces as follows: Bottom layer wrong side up, batting layer, then top layer right side up on top. Pin the layers together (or use basting glue). OR stitch around the perimeter of the fabric, 1/8" from the edge (this works for small pieces of fabric).
Using a washable, non-permanent fabric marker, draw a line from corner to corner on one side of your project. Draw another line between opposite corners.
NOTE: If your fabric is not square, see "Non Square Fabric" after these directions.
Stitch Corner To Corner
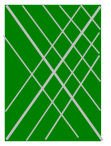
Stitch a line diagonally from corner to corner, following one of the lines you drew. Stitch a second line, diagonally, between the opposite set of corners.
The stitching lines have been enhanced in red.
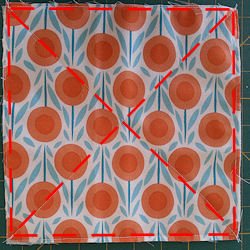
Stitch Remaining Lines
Then, position your needle so that the quilting bar runs over first stitched line. Stitch the second line. Use the quilting bar as a guide for sewing each new line. I usually run a few lines one way, then a few the opposite way. For a small piece, it is OK to stitch all lines one way, then stitch all the opposite lines.

stitch to create pre-quilted fabric
In the next photo, the first set of lines have been stitched (parallel to the line that runs from upper left corner to the lower right corner).
Continue stitching until you have filled the space with stitched lines (both sets of lines).
If you don't have an edge guide, measure and draw lines parallel to one diagonal line; repeat with the other diagonal line. Stitch over drawn lines.
Line Spacing (added note thanks to a visitor’s question)
I space my lines 1” apart. However, you can space more or less, depending on the project. You might like the appearance of larger spacing on a larger project, for example.

DIY pre-quilted fabric
I have created tote bags, glasses cases, placemats and several other items using this method of DIY pre-quilted fabric.
NON-SQUARE FABRIC
What if the fabric you need to pre-quilt is not square? It might be 45" x 30" for example. If your fabric is not square, you have two options.
Method 1: Square off a section of fabric (if your fabric is 45" x 30", you would mark off the segment that is 30" x 30"). Draw a line from each set of corners as explained above, but only within the marked off area (see image on left below). Your 2 sets of lines would be perpendicular to one another. As you are sewing, extend the lines beyond the marked off area. See the figures on the left below.
Method 2: Draw your lines from corner to corner. Stitch lines parellel to these lines. Your 2 sets of lines will not be perpendicular to one another. Your lines will form diamond shapes. See the figure on the right below.

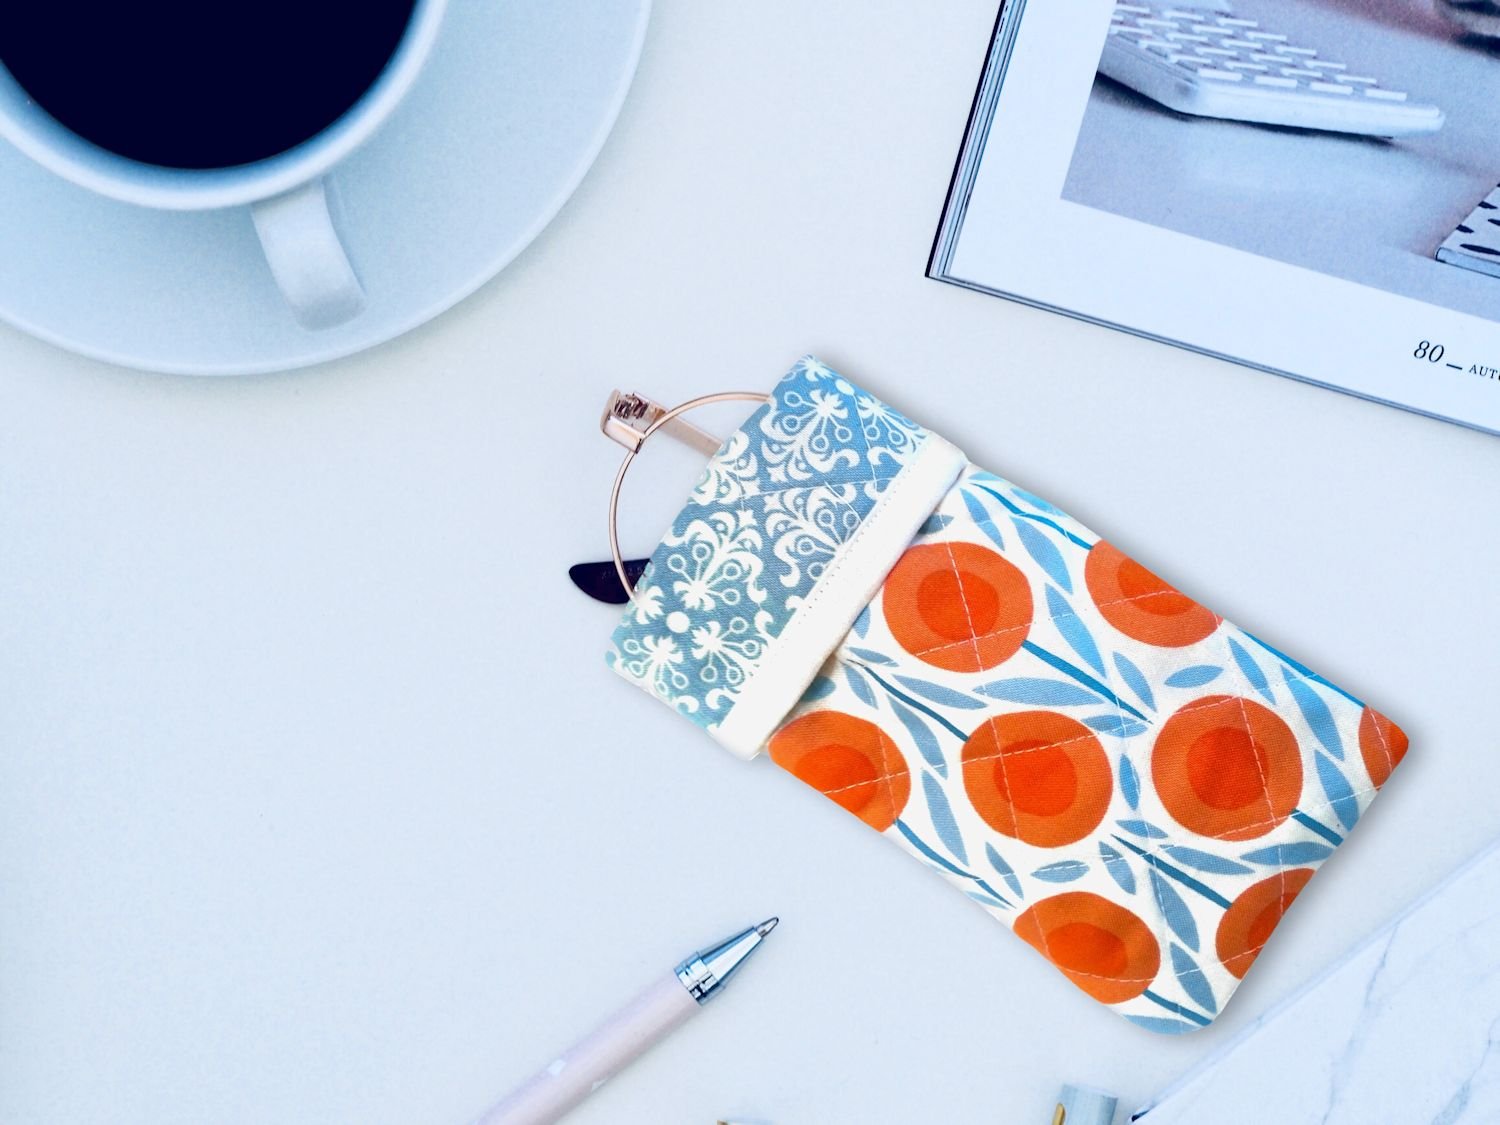
Use your new pre-quilted fabric with our glasses case pattern. I LOVE this pattern. Quick, easy, adorable. Padded case.
Quilt & Kitchen Projects


Thoughts From The Workroom


Table trivet - fast crochet with bulky yarn.