Five Fun Kids’ Crafts

Fun, rainy day projects
Originally on our previous site: craftandfabriclinks.com
Disclosure: This site contains affiliate links. As an Amazon Associate, I earn from qualifying purchases. Clicking on links, and purchasing products, may result in the seller paying us compensation - at no extra cost to you. Affiliate links are in green.
Also see:
Notes From The Workroom & Trails
10 Easy Sewing Projects
Art Projects
Craft Projects
Quick & Easy!
Five fun projects to keep the little ones busy on a rainy day.

1. Pencil Holder
Teach your child about recycling! Create a beautiful pencil holder from a recycled metal can. Add a photograph, or left-over scrapbook paper and embellishments.
Economical, because you can use aluminum cans you already have, and left over papers and embellishment from your scrapbook and other craft or sewing projects.
You could even use scraps of fabric - see our decoupage mosaic fabric egg project.
I scanned one of my paintings - now I can enjoy my painting in a new way.
Wouldn't it be adorable to print children's art for a can?
SUPPLIES
I recommend using Glue Dots and double sided tape.
aluminum can: washed and dried & sharp areas removed
scissors / paper cutter
scrapbook paper* wide enough to cover can
*photograph or fabric can be used in place of scrapbook paper
glue dots / double sided tape
tape measure
OPTIONAL
embellishments (small flowers shown in bottles, plus "embroidered" butterfly stickers, self adhesive ribbon)
DIRECTIONS
1. Wash / Dry Metal Can
Wash and dry thoroughly one can.
Check Size
Compute your dimensions. Cut a piece of scrap paper the size you need for your can. Wrap the scrap paper around the can to be sure you are happy with the size. Do this before cutting actual scrapbook paper, or creating your photo print.
I made mine so that there was a very slight overlap.
2. CREATE IMAGE FOR CAN
SCRAPBOOK PAPER / FABRIC
Cut the scrapbook paper or fabric to the size of your can. It can fit exactly around, or there can be a slight overlap.
If your paper is not long enough, it can be pieced as shown on the right. The piecing can be covered with a ribbon or other embellishment.
PHOTOGRAPH
For my photograph, I scanned one of my "pour acrylic paintings". You can learn how to create beautiful pour paintings on my Youtube Channel.
I scanned my painting (you can also photograph a painting or piece of artwork, such as child's drawing), then used my graphics software program to cut a portion of the painting that measured 8.5" x 3.75". I printed to HP Photo paper at a resolution of 200 dpi. Once my photo was printed, I used my paper cutter to trim the photograph from the photo sheet.
3. Apply Glue Dots
Wrap your scrapbook paper or photo around the can to check fit, or compare it to the original scrap piece of paper (I recommend wrapping it around the can just to be sure).
I used glue dots to attach the paper, less mess! There are two methods to choose from. Glue dots are wonderful because they can be tucked under embellishment or placed on the back side only of the image(so they are not visible).
Method One
Apply the glue dots to the can, then attach the image.
Method Two
Apply glue dots to the back of the image.
Whichever method you choose, I also recommend applying a strip of double sided tape along the edge, from corner to corner, where the two ends of the image will meet. You will need good adhesion at the corners.
For this version, I was not using ribbon, so I used the double sided adhesive tape along the two end edges of the image. No glue dots showed, as they were all on the back side of the image.
IF USING RIBBON & OTHER EMBELLISHMENTS
5. Add Ribbon
I used self-dhesive ribbon. Regular, non-stick ribbon could be used with glue dots. Strips of scrapbook trim could be used as an alternative (with glue dots), but the ribbon adds more dimension.
Finished Through Step 5

Attach the ribbon as desired to create borders. I made sure all border seams were in back where the paper seam was. This way I created a "front" that would face forward on my desk : )
6. Add Embellishments
I had some pretty lace butterfly stickers; they made very pretty additions to my pencil holder. Buttons, stickers and other items could also be used. I decided to add some flowers.
2. Flower Magnet
SUPPLIES

magnets (I used Aleene's magnetic Tacky Dots™)
self-adhesive flower or other embellishment - or cut from fabric or paper
glue (if you do not use self adhesive decoration and magnet
DIRECTIONS
1. Peel Off Adhesive
Peel the adhesive off the top of the magnet.
2. Stack Magnets(optional)
If you wish to have a thicker magnet, simply stack two together. The adhesive on the one underneath will hold the upper magnet in place. Or you can just use the sticky side of one magnet to stick to your decorative item (in this case the flower is sticky as well).
3. Apply Decoration
Remove pad from adhesive side of magnet. Press decorative item onto adhesive side of magnet (or use glue if your embellishment and / or magnets are not the self-adhesive type.
Finished Magnet
Create magnets based on room type (baby's room, kitchen, etc.) or use holiday / seasonal theme.
The following photo on shows the back side (magnet side) or our decorative magnet.

3. Tiny Town
Another recycle project. Turn recycled household items into a tiny town!

Children love anything miniature. Now they can create their own tiny town using paper, cardboard, buttons, paint, fabric and other items from your sewing or craft box. They can also recycle milk cartons, cans and other items
INSTRUCTIONS
Use paints and markers to create buildings. Use glue to attach decorative items such as beads, small plants, and other items.
To create the school shown in the photo, a cardboard box was painted; then a piece of yellow foam was glued on as the "light" by the front door.
Add Accessories
My girls added small cars to their town. Miniature items such as lamp posts, park benches, and other items could be added as well.
I painted a "Southwest Blue Sky" painting, and the free tutorial is available on my youtube: Blue Sky Painting. I used it for the miniature town backdrop. A painting can be scanned and printed several times to span the length needed for your child's tiny town.
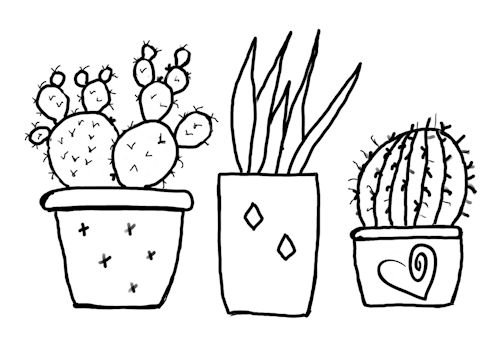
4. Free Printable Graphics -coloring or painting

I am posting a few fun graphics for coloring with crayons or paints. They are all jpg files. To use as you would a stamp, print to cardstock or paper, then fill in as you would a regular stamp.
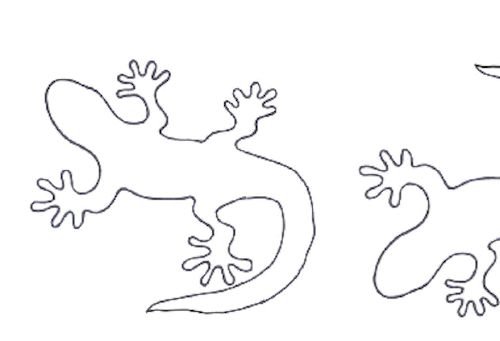
We printed the lizards to a one-sheet label. Kids can color in or paint the lizards, then cut them out to create their own “lizard stickers.”
The images are shown below, after the links to the free coloring pages. The pages are all jpg files, and print to an 8” x 10” paper or label sheet.

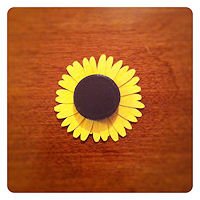
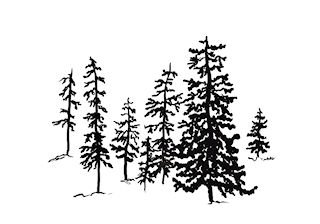
The colored image of cactus pots and trees are examples. The images download as shown below.


5. Box Decorating

All you need are some old shoe boxes or other box for these two projects. Use any type of embellishment or bling for the first project, and torn tissue paper for the second project. Your child can use whatever is available, along with their own imagination.
projects provided by my daughter, Kayla
Bling Box
Use any size you wish for this project. I wanted to store personal items that I needed to keep handy (keys, papers, mail, etc.), so I chose a large shoe box. I lived in a studio apartment at the time I made this box, so I knew the box would always be in sight. Therefore, I chose colors and decor to match my apartment. I was planning a move to another city, so "faith, love & hope" were important themes.
SUPPLIES
one box with lid
paint (if you need to paint the box - I used a black spray paint)
bling
trim (feathers, beads, ribbon, strips of fabric, stick-on trim)
press on letters (for words such as "faith", your name, etc.)
scissors (use safety scissors for a child)
ruler
DIRECTIONS
1. Choose Supplies
Lay out all of the decorating supplies and decide how you want to use them on your box. Think about the use of the finished project. Is it for a special occasion? Gift box? Personal box? Choose supplies that best suit the purpose of the box and create style you wish to achieve.

2. Paint Box
If needed, paint the box. Allow to thorougly dry. Sponge paint, stencil, paint patterns (tape off areas), or paint a solid color. I chose a black spray paint. For instructions on painting a paper mache box (or any cardboard box), watch my YouTube video: Painted Memory Box
3. Adhere Decor To Box
Use glue to fasten the items to the box (or press on if the item contains self adhesive backing) once you decide on placement of the embellishments. I glued the ribbon (zebra type print around the sides of the box top); the other items all contained self-adhesive backing.
4. Check The Finished Item
Look at the box. Does it have the look you had in mind? Does it need more color? More bling? For this project, I placed a few single bling stones at random to fill in space on the box top. The overall look was simple, but effective.
Paper Mosaic Box

Tearing paper helps decrease anxiety, so this is a great project for anyone going through a stressful situation. Place unused pieces of torn paper into ziplock bags for future use. Glue sticks can be used in place of decoupage, which would make this an ideal project for anyone confined to a bed (such as a hospital patient).
Turn a cardboard box into a designer storage piece for your bedroom, hospital room, or other area. Store toys and other small items where you can find them. Create a beautiful finish by painting over the box with decoupage, gloss or semi gloss varnish when finished (optional - an adult must help with painting).
Supplies

1 paper mache box (purchase from craft supply store)
several sheets of paper, in multiple colors
school glue, glue sticks or decoupage
paint brush (small roller brush works well)
spray-on or brush on gloss or matte finish varnish (optional)
NOTE: You may wish to pre-paint the box. Use Gesso or other primer, then paint, then follow these instructions for adding a layer of paper. Watch my Paper Mache Box Painting Video for instructions on painting paper mache items.
Directions
1. Tear paper into small pieces (to resemble mosaic chips)
2. Apply glue stick to paper pieces and attach paper pieces to box. OR use decoupage to attach pieces to box. The paper pieces will overlap one another on the edges.
OR use a roller brush to paint a thin layer of glue over the box, lay down the paper pieces; then paint a top coat of glue over the box. To see this method, go to: Paper Mache Box.
3. Create shapes such as the hearts shown on the right by glueing paper pieces to a sheet of paper and then cutting out the desired shape. The pre-made shape can then be glued to the box. Use contrasting colors for the pre-made shapes, so they will stand out against the mosaic papers on the box. We started by making pre-made shapes, but didn't use them for this box.
When finished, spray over the entire box with a finishing spray (gloss or semi-gloss) - or use decoupage.
More Child’s Crafts


Easy Sewing For Beginners


Printable, foldable mini boxes. Teach your child how to create a 3 dimensional object from a 2 dimensional print. Learn math proportions of a cube. 3 prints to choose from, plus a blank - ready to decorate.