Halloween Applique Blocks

Halloween Applique Patterns
NOTE: This project contains the patterns for the 3 scenes. The patterns create layered applique. Use the Halloween scenes for quilt blocks, hot pads, pillows, or wall hangings, or quilts.
Special Note: This pattern is one of my oldest - Originally on our previous site: CraftAndFabricLinks.com. Enjoy! Christina Sherrod, designer
Disclosure: This site contains affiliate links. As an Amazon Associate, I earn from qualifying purchases. Clicking on links, and purchasing products, may result in the seller paying us compensation - at no extra cost to you. Affiliate links are in green.
Also see:
Notes From The Workroom & Trail
Quilt Patterns
Halloween Projects
Wood Pumpkin For Yard

Pillow
If you would like to place the block onto a pillow, as shown above, go to: Basic Square Pillow to learn how to create the pillow cover.
Applique Pressing Sheet & Free Motion Embroidery
Use fusible web (also called iron-on adhesive) to create these fall scenes. Free motion embroidery would add interesting detail. An applique pressing sheet is helpful in creating intricate appliques that are then pressed onto a background layer, but is NOT mandatory for this project.
This is not as difficult as it appears. An applique pressing sheet assists in creating intricate appliques. Free motion embroidery is easy once you’ve had a little practice.
For instructions on using fusible web and an applique sheet, go to: Applique Sewing Sheet Lesson .
Blocks 1, 2, and 3 are shown below.

Pattern Creation
I enjoyed creating these patterns. I played around with a graphics program (many years ago) to draw each scene, then turned them into applique patterns.

Block Size
Each block measures 6.5” x 6.5”. Use the blocks as is for a quilt, wall hanging, hot pad, tote bag, pillow, or any item you wish to applique.
My instructions are for creating blocks only. Purchase extra supplies for borders, backing, insulation, etc., depending on what you are making: pillow, tote, quilt, hot pad.
SUPPLIES
Fabric (blocks only)
Purchase extra fabric if you plan to prewash and shrink your fabric.
Hills: Two pieces of 7” x 4” dark green fabric
Tree and witch hair: 7” x 7” piece of medium brown fabric
House and broom straw: 6” x 6” tab fabric
Pumpkin & window interiors: orange scraps (3” x 4” should be enough)
Witch hat and dress, window outlines, porch, grave marker: scraps of black fabric
Witch face and hand: scraps of medium green (2” x 2” is more than enough)
Moon and Pumpkin glow: 7” x 7” piece of yellow fabric
Roof, porch roof, door and broom handle: 6” x 4” dark brown
Witch cape: 4” x 3” piece of black sheer fabric
Ghosts: 2” x 2” white
sky: 6.5” x 6.5” (I used a gray print that looked like a stormy sky)
NOTE: the sky is the base fabric that the applique will attach to
Other Supplies (you may need depending on what you are making)
backing fabric
border fabric
binding (for quilt or hot pad)
fusible fleece (I use for placemats - nice padding)
insulation (for hot pad - I use Insul-Bright)
General Sewing Supplies
thread to match fabric background
sewing scissors
pins (I use quilting pins)
large sewing ruler
rotary cutter and mat (optional but nice)
fusible web (iron-on adhesive: for attaching applique pieces)
stabilizer (optional - if you do any machine embroidery you will need stabilizer)
applique pressing sheet (optional)
This is a special type of sheet used for creating detailed appliques. The pattern is placed on a working surface. The pressing sheet is placed on top of the pattern, which can be seen through the sheet. Applique pieces are placed on the pressing sheet. When the pieces are bonded with the fusible web, they will stick to one another, but not to this sheet (they slightly stick but only enough to be held in place). When the applique is finished it is easily peeled off the sheet and is ready to iron onto your background fabric.
An applique sheet is NOT mandatory for this project.
fusible web (iron-on adhesive)
The following photo shows my fusible web (pattern drawn onto paper side) being ironed onto the back of my fabric. After this point, I can cut out the house pieces, pull off the paper, then iron the house onto the background fabric.

Pre-Washing
Note, if you pre-wash your fabric, do NOT use fabric softener. Washing will remove any sizing, which will allow for a stronger bond. I do not pre-wash my pieces and they stick well. Any loose endes can be glued using aplique glue.
Patterns
Our patterns download as pdf files.
Block 2: Haunted House, Ghosts & Grave Marker
Blocks 1 & 2: Hill Patterns Note: the hills pattern says CraftAndFabricLinks - that was my previous site
Pillow Pattern
If you would like to create a pillow, with envelope back opening (for easy removal of pillow), go to: envelope back pillow pattern. Follow those directions, but make your pillow square (or the shape and size you need).
DIRECTIONS
NOTE: For instructions on creating applique using fusible web and an applique sheet, go to: Applique Sewing Sheet Lesson .
Your fabric will shrink, so pre-wash, dry and press before using if you plan to wash your project in the future.
Print patterns above that you wish to use. Cut out the pattern pieces. Turn them over (wrong side down) and trace the pattern pieces onto the paper side of the fusible web.
Cut our all fabric pieces (now adhered to the web). Peel off the paper backing from the fabric pieces.
Lay your 6.5” x 6.5” sky square down, right side up. Lay the next piece on top of the sky, also right side up. Continue until you have all pieces down. Refer to the guide below for the order of pieces.
DO NOT press with iron (which glues it all together) until you are sure of placement.
Once you are happy with the placement of all pieces, follow the manufacturer’s instructions for the proper heat setting.
Block 1: twisted tree and pumpkin
sky
hill
tree
yellow of pumpkin glow
pumpkin
stem
Block 2: haunted house
sky
hill
lower part of house
tall part of house
orange window glow
window outlines, door and door roof
porch
grave
ghosts
Block 3: witch and moon
sky
moon
broom pieces
hand and face
dress
cape
hair
hat
Finishing
Adding paint or embroidery is optional, but adds nice detail.
Use fabric paints (I used a small squeeze tube that creates a fine line) to add detail and to outline your applique pieces. Add eyes to the ghosts, “writing” on the grave marker (little squiggle lines), fencing on the hill behind the house, door knob, etc. The fabric paint helps hold down the edges of the applique pieces.
Do NOT wash the finished piece if you have added fabric paint - the paint tends to come loose.
Halloween Projects

Pumpkin Painting
pattern, instructions, & video
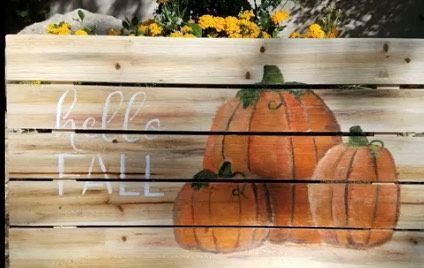
Wood Palette Pumpkin
Paint a pumpkin on a decorative palette!
Articles & Tips


Our most popular Christmas decor projects.