Easy Table Runner

Disclosure: This site contains affiliate links. As an Amazon Associate, I earn from qualifying purchases. Clicking on links, and purchasing products, may result in the seller paying us compensation - at no extra cost to you. Affiliate links are in green.
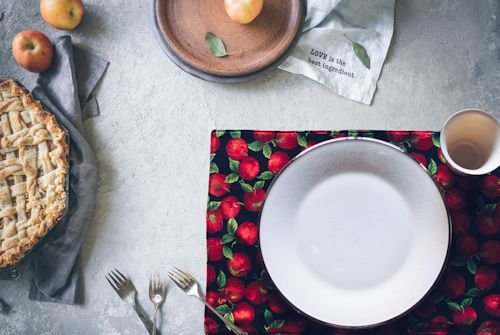
Great “beginner” sewing project. Practice straight stitching. Make 6 placemats from only 1 yard of top fabric!
Also see:
Articles: Tips & Adventures
Applique Patterns & Lessons
Remodel Projects
Holiday Projects
Placemats & Table Runner
Company’s coming! Need a set of placemats and table runner in a hurry? My patterns are quick and easy.
It takes just one yard of top fabric and one yard of back fabric, plus one yard of fusible fleece to make six easy placemats. It takes just a bit more to add the table runner. Besides being quick to make, this project is very economical. If you are making a set of table runners only, just 1/3 yard each of top and backing fabric make TWO runners (without contrast ends)! See "Supplies" below for a complete list of materials.
I keep several sets around for holidays, and just to change up the color scheme or mood.
NOTE: Fusible fleece adds a nice padding. It noes NOT provide insulation. If you need insulation against heat or cold, use cotton batting and Insul-Bright.
Table Runner Size
My directions, as they are, create a table runner measuring approximately 10" x 24". Adjust the directions to customize the size.
Soft Padding
This project uses Fusible Fleece. This provides nice padding. I often use fusible fleece for this type of project. Visit Amazon links at the end of this article to purchase fusible fleece, insul-bright, heat resistant cloth, quilting pins, and other items I use in my projects.
Cutting Tools
I recommend using a Rotary Cutter, Cutting Mat, and Sewing Ruler. I use these tools for most projects. They allow for easy, precise cutting.
Supplies
Project Supplies
1/3 yard top fabric (or one piece measuring 10.5" x 20.5")
1/3 yard backing fabric (or 1 piece measuring 10.5" x 24.5")
2 solid or contrast pieces for end strips, each measuring 10.5" x 2.5"
1 piece fusible fleece* measuring 10.5" x 24.5"
*Interfacing works also. I like the fusible fleece because it gives a bit of cushion to my place mats and table runners.
Sewing Supplies
thread
sewing scissors
quilting pins
large sewing ruler
fabric marking pencils
seam ripper
rotary cutter and mat (optional but nice)
PRE-WASH, DRY, & PRESS ALL FABRIC BEFORE USING
DIRECTIONS
NOTE: All seams 1/4"
1. Cut Fabric Pieces
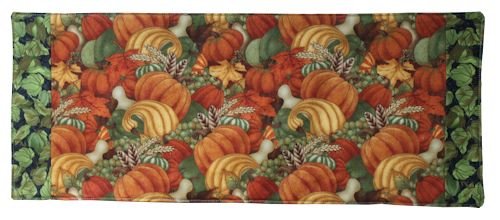
Cut one main top piece measuring 10.5" x 20.5". Cut two end pieces, each measuring 10.5" x 2.5". The end pieces will be the contrast pieces on the ends of the table runner.
Cut 1 fusible fleece piece measuring 10.5" x 24.5".
2. Create Table Runner Top
Stitch one end strip piece to each end of top fabric, right sides together. Press seams open. Refer to photo above. I used a green leaf pattern as my contrast end strips. Trim the entire piece to 10.5" x 24.5".
3. Attach Fusible Fleece
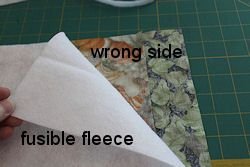
Lay fusible fleece with adhesive side up. Lay top, pieced layer over fleece, right side up (wrong side of top layer is toward fleece). Iron top layer to fleece, following directions that come with your fusible fleece.
The fusible fleece will now be adhered to the wrong side of your top layer. The photo on the right shows it in the opposite direction. It was flipped over before pressing. It is best to press from the fabric side. When you are finished, the fusible fleece will be adhered to the wrong side of the top piece. If you prefer, you can fuse it to the backing instead.
4. Layer & Stitch

Pin the top piece to the bottom piece, right sides together. Stitch around perimeter using a 1/4" seam allowance. Leave a four or five inch opening for turning right side out. See diagram at right. This is a diagram of the easy placemat, but the table runner is put together the same way.
Trim corners (cut corners off, diagonally, close to stitching).
Turn right side out. Use a turning tool or blunt end of a crochet hook (or something similar) to push out corners. Turn open edges under. Press all edges and corners with iron.
Kitchen Patterns


Projects To Help You Organize


Tips From The Workroom & Trails


Table trivet - fast crochet with bulky yarn.