Fabric Flowers

How To Create A Bouquet
We attached our flower to a hair clip. A little girl was very happy!
If creating a bouquet, attach your finished flowers to floral stems. To do this, create a second, smaller, base flower. Slip the stem up between the two base flower layers and hot glue the layers together. This way, the back of the flower is nicely finished and the stem is held securely.
Disclosure: This site contains affiliate links. As an Amazon Associate, I earn from qualifying purchases. Clicking on links, and purchasing products, may result in the seller paying us compensation - at no extra cost to you. Affiliate links are in green.
Size Of Flowers
Customize your finished flower size by changing the size of the underlying fabric flower shape, fabric strips, buttons and other decorative items.
SUPPLIES

hot glue gun
scissors
embroidery floss
buttons
(50mm) metal hair clip
embroidery needle (for floss)
1 strip of tulle or lace measuring 60" x 1" (I purchased 1/4 yard of 60" wide tulle, then cut across the width to create a strip 1" x 60" - this left enough to create several more hair clips)
PATTERN
The correct printed size is approximately 4.5" high x 5" wide. Print, then enlarge or shrink as necessary for your needs. The pattern is a pdf file.
DIRECTIONS
1. Cut Flower Base

Print our pattern, or draw your own. Using the pattern, cut the base flower shape from felt.
2. Create Tulle / Lace Layer
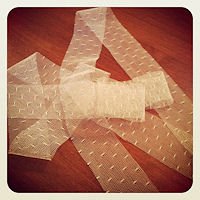
a. Cut a strip of lace/tulle.
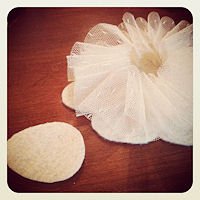
b. Fold lace to create a layer that fills base flower area.
Cut a circle shape from felt. This will be used in the next step for holding the tulle.
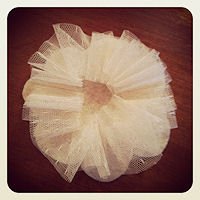
The third photo below shows the finished tulle/lace layer.
Run a line of glue around the inner edge of the tulle/lace, and apply some glue to felt layer in the "hole" created by the tulle/lace circle.
c. Glue the holder on top of the tulle layer. This ensures the tulle stays in place.
Check for loose areas. Apply more glue as necessary. All layers should now be securely glued into place.
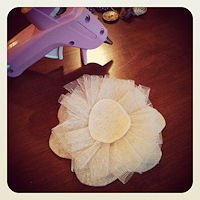
3. Create Inner Flower
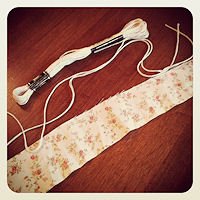
a. Cut a strip of cotton fabric.
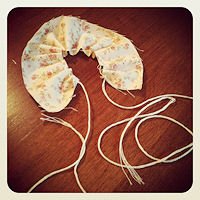
b. Using a needle and embroidery floss, sew a gathering stitch along one side of the fabric strip. Pull the ends of the floss to gather the fabric along the stitched edge, creating a circle from the fabric strip.
c. Tie the ends of the floss, securing the strip into a circular shape. Overlap the end edges of the fabric strip and adjust gathers as necessary.
d. Using a needle and embroidery floss, stitch the button onto the center of the inner, fabric flower. Run the floss from the button to the upper fabric layer (not through all layers). It works best to keep the floss loop large and run it through a few times between the button and fabric, then pull tight, wind around the button shaft a few times, then tie off and trim. Add a bit of glue if you feel it is needed.


4. Glue Clip Or Stem To Flower Piece
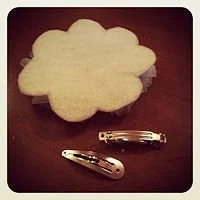
Turn the flower over (wrong side up). Glue the metal clip to the felt surface, using the hot glue gun. Be sure to glue the top side of the clip to the felt surface, keeping the part that opens toward you.
If attaching a stem, cut a second felt piece. Insert the stem in between the two felt layers and glue into place.

Experiment With Fabrics
For this flower, we adhered the blue fabric to the felt (for body), then added the lace and braid-look button.

Precious Memories
Learn how to make a Bridal Sash.
Floral Projects


I turned a fallen tree disaster into a beautiful evergreen bouquet for my front porch. Easy! Use holiday items from your stash.